AVS HOL LAB7 – Access Azure Storage Account through Azure Private Endpoint
One of the key advantages of having VMware workloads running on Azure VMware Solution is the seamless integration with other Azure services. Communication from AVS Private Cloud workloads to Azure services will be private and secure through Azure Private Endpoint, which injects a Network Interface for Azure PaaS Services in Azure vNet allowing the PaaS serving to have a private IP address, that will facilitate local communication with AVS without the need for the traffic to traverse through the Internet. Also, Azure Private DNS Zones will close the gap by allowing the workloads to be configured with the normal Azure Service endpoint URLs, where it the background these URLs will be translated to private IP address of the PaaS service instead of the public endpoint.
So, let’s start the steps of creating and configuring an Azure Storage Account that only allow traffic through the associated Azure Private Endpoint. And you will enable Azure Private DNS Zone for the Private Endpoint to allow smooth name resolution.
-
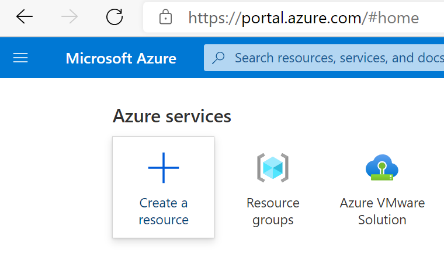
Go to Azure Portal home page, click on Create a resource button.
-
Select (or search for) Storage account.

-
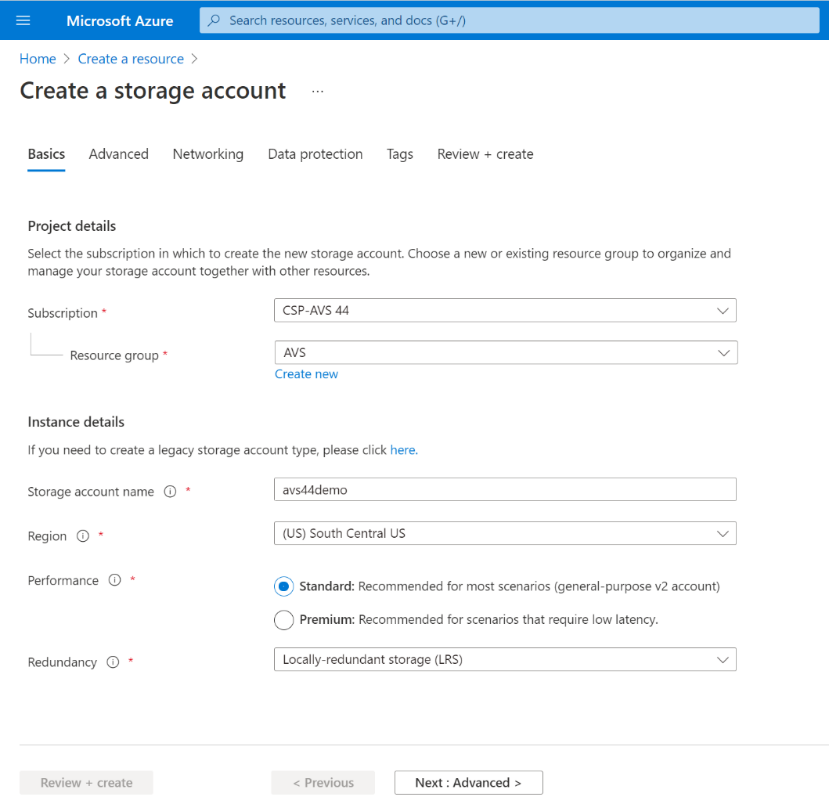
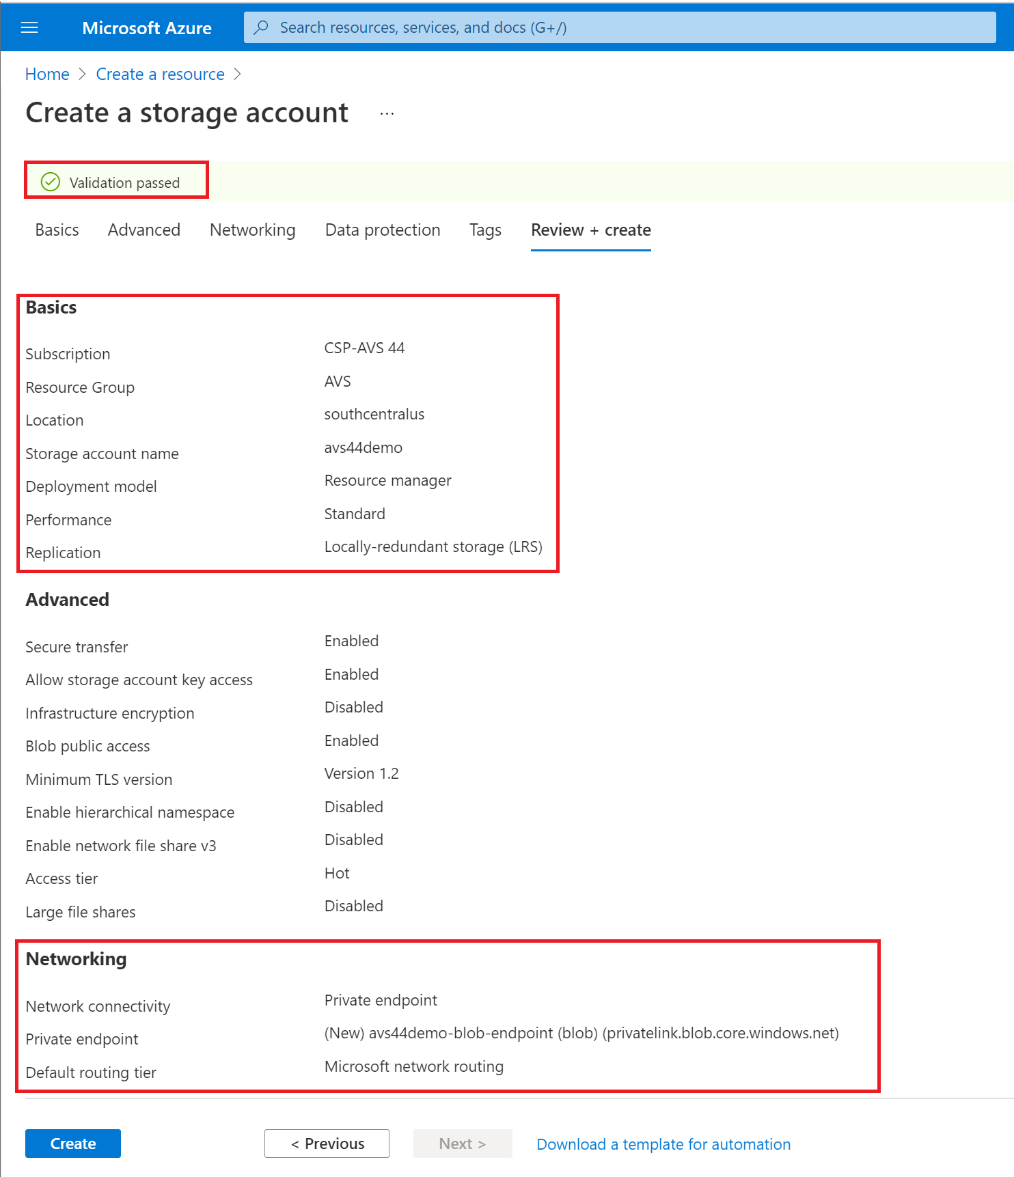
Fill out the main fields at the Basics section to start creating a new Storage account, such as Subscription, Resource Group, Name, etc. … Keep the same values in the other fields as you see below.
-
Move to Advanced section, click Next.
-
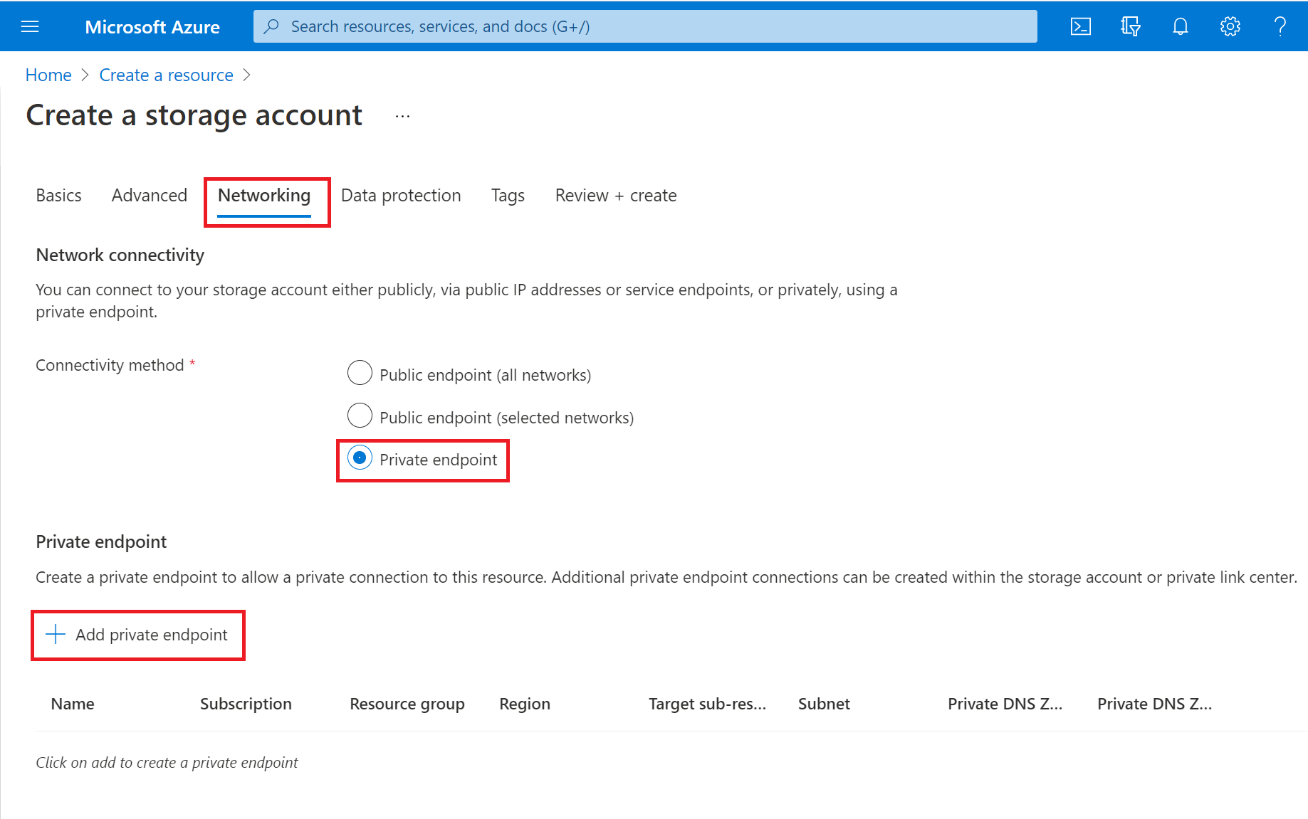
Move to Networking section, and select Private endpoint. Then click on + Add private endpoint.
-
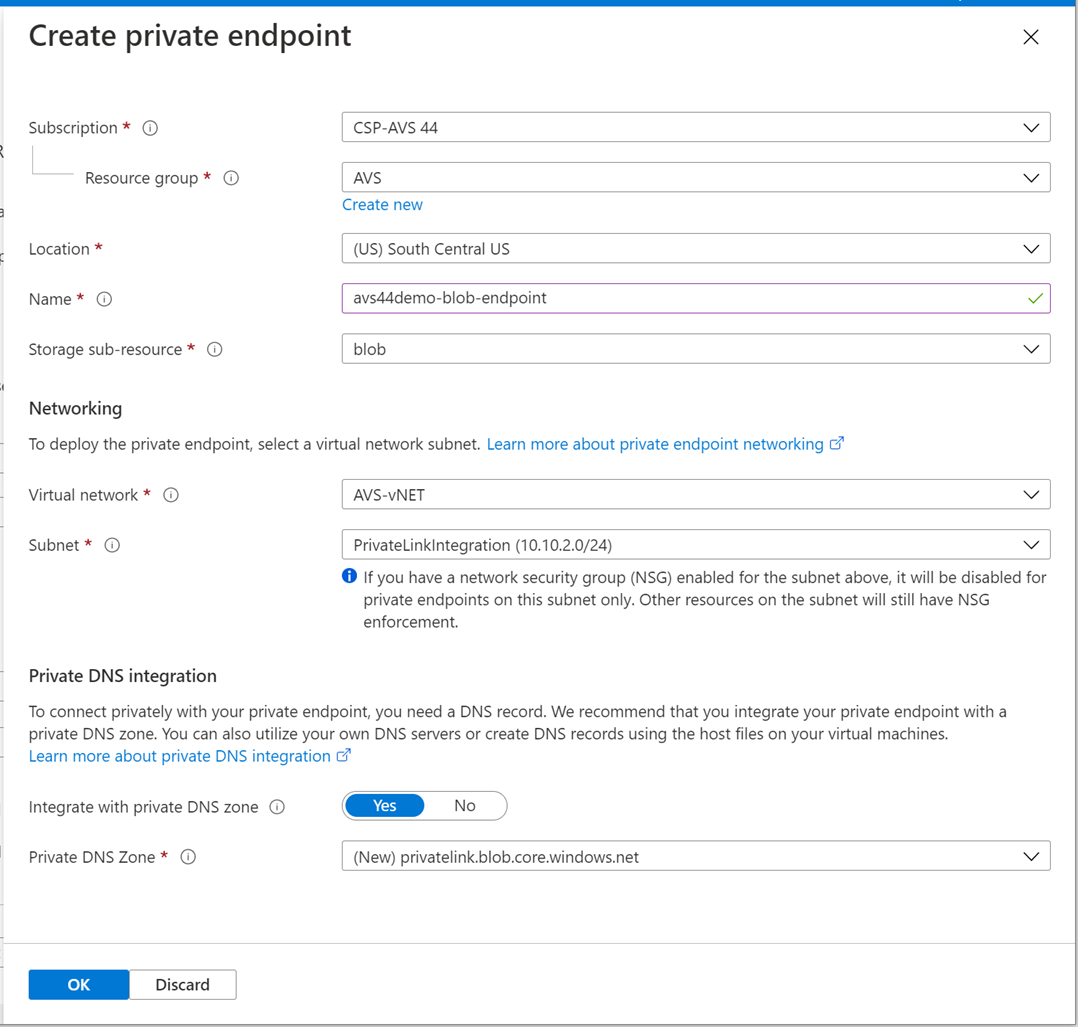
Fill out the fields in Create private endpoint pane.
-
Make sure to select the Storage sub-resource: blob.
-
Make sure the Location of the Private endpoint is the same region of the vNet that’s connected to AVS Private Cloud. In the example below it is South Central US.
-
Note that in this lab the vNet exists and is called AVS-vNET and the subnet for Private endpoint has also been created and called PrivateLinkIntegration which should show up in the drop-down list.
-
Under Private DNS integration, make sure to select Yes for Integrate with private DNS zone. Since it didn’t exist in this environment, it will create a new instance.
-
-
Click Ok at the Create private endpoint pane, and you should see something similar to the following:

-
Click on Next to move to Tags pane.
-
Click on Next to move to Review + Create pane. After validation is successful click on Create to create the Azure Storage Account with the associated Azure Private Endpoint and Azure Private DNS Zone.
-
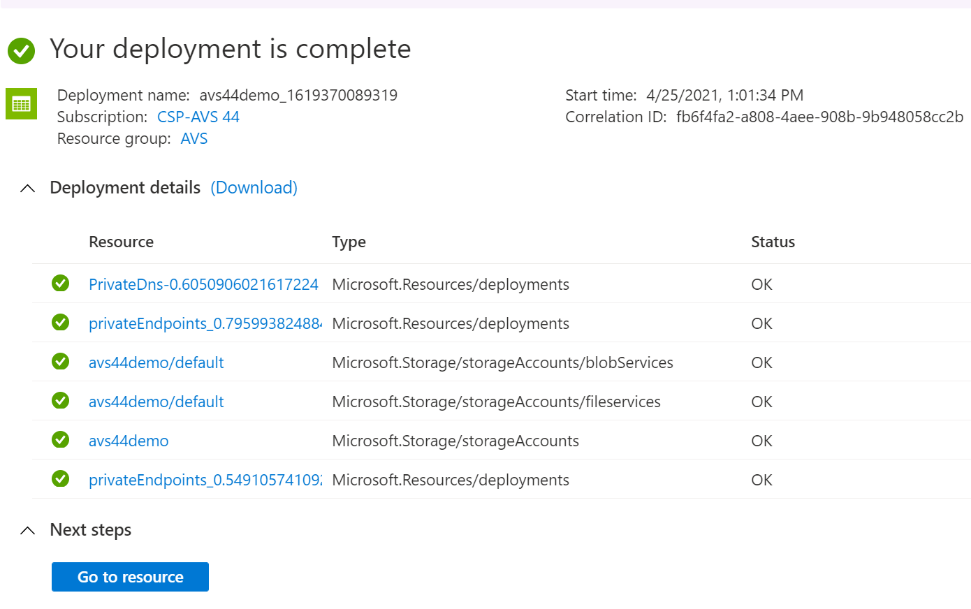
It will take few minutes, and the deployment will be done.
-
Go to the created Storage Account by clicking on its name, for example in the above screenshot it was avs44demo.
-
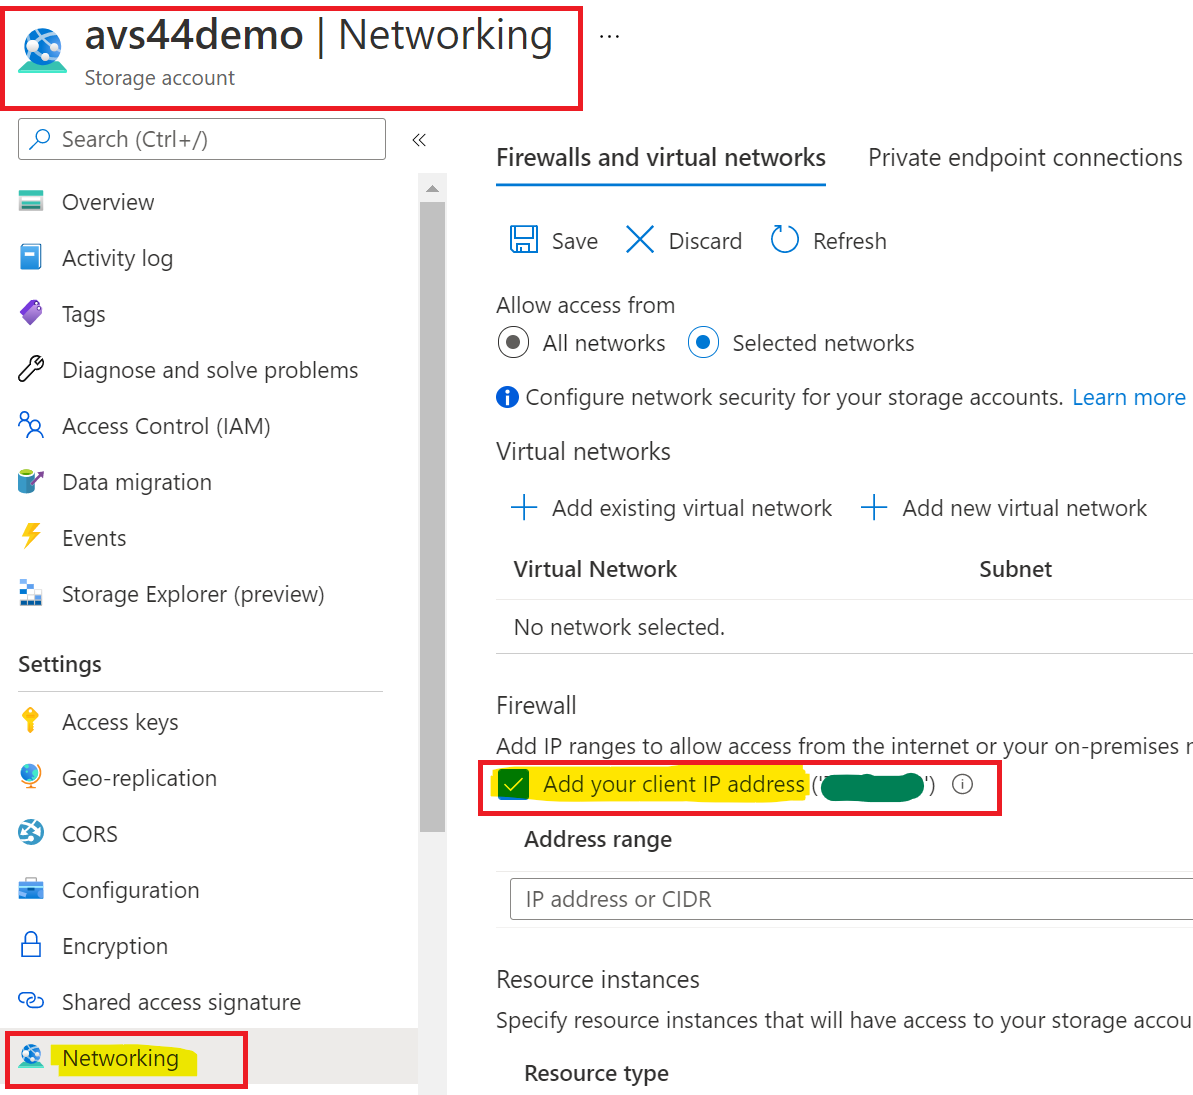
Go to Networking section on the Storage Account blade. There you will temporarily add a firewall exception for your IP so you can upload a file to the Storage account, and in a later step you will remove that firewall exception.
-
Your IP should appear in the list there, like this:

-
Click on Save button to save changes:

-
Next, refresh your browser tab to make sure change has been reflected:

-
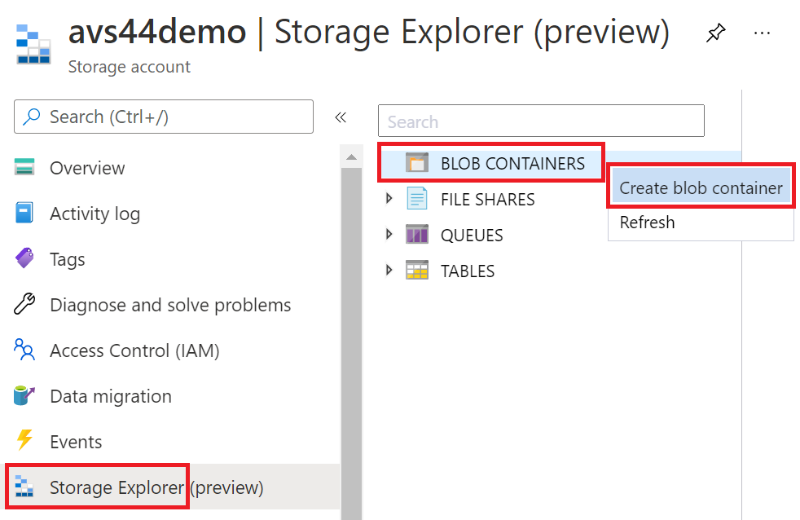
Create a new blob container by going to Storage Explorer section and right click on BLOB CONTAINERS, then click on Create blob container.
-
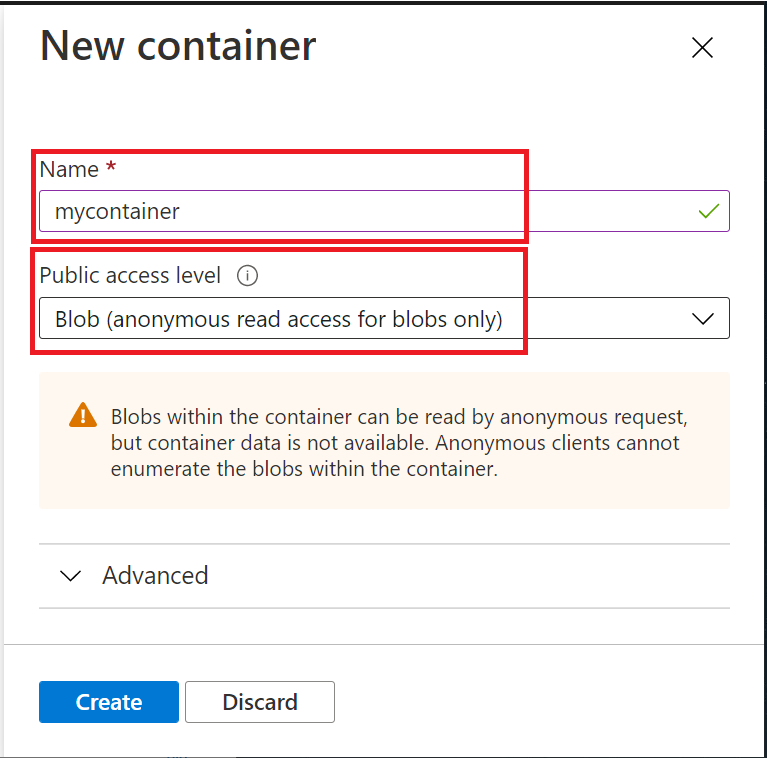
Give the container a name, and make sure the Public access level is set to Blob (anonymous read access for blobs only), then click on Create button.
-
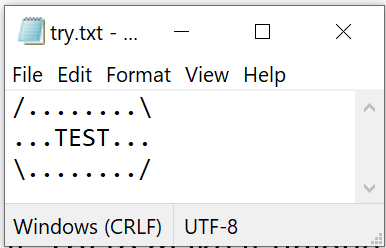
Create a text file (.txt) name it as you want and type any text in it. Try to make it unique so you can notice the content in later steps. For example:
-
Upload the created text file (try.txt) to the blob container that you just created.

-
Copy and store the URL of that text file blob as you will be using it in future steps. This how you do it:

The URL will look like this: https://avs44demo.blob.core.windows.net/mycontainer/try.txt
-
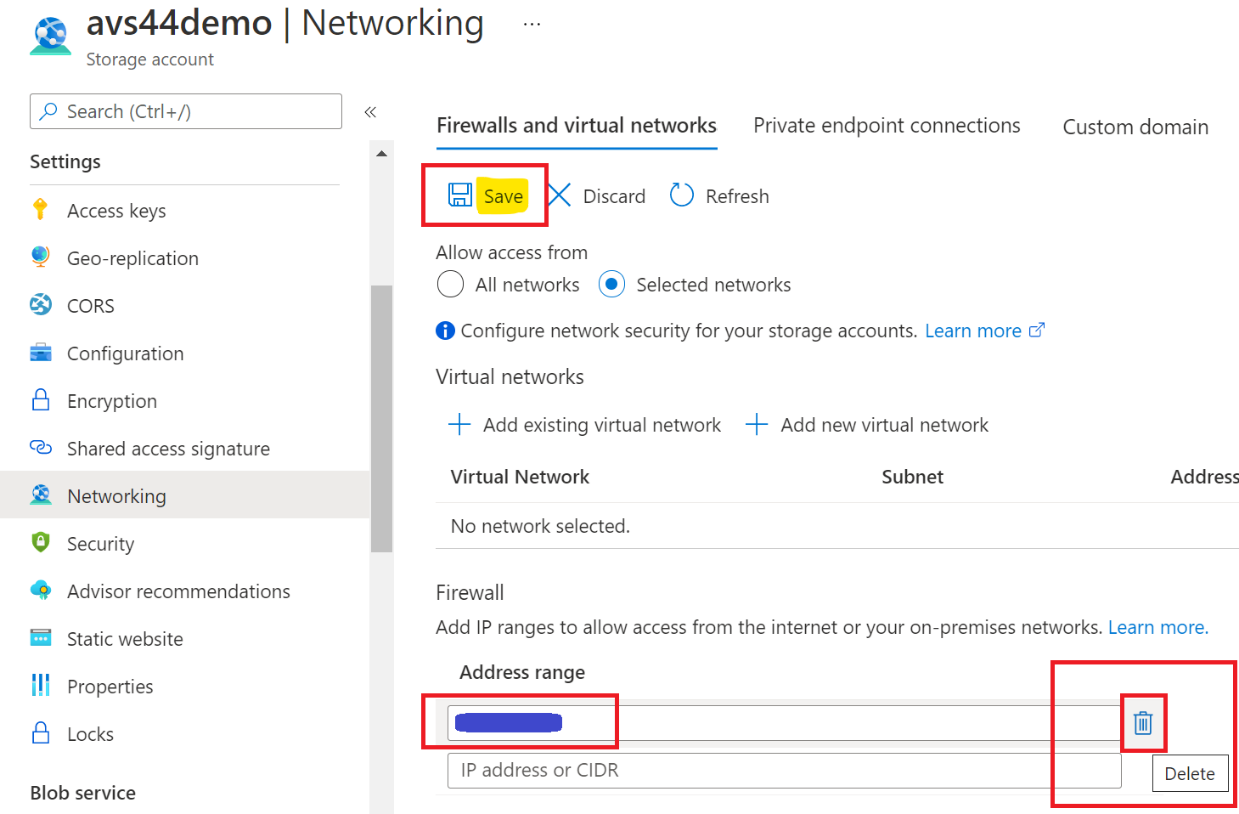
Let’s now remove the Firewall exception that you added earlier, as it is no longer needed. By going to Networking and deleting your IP address, then click on Save button to save changes.
-
NOW, is testing time!
-
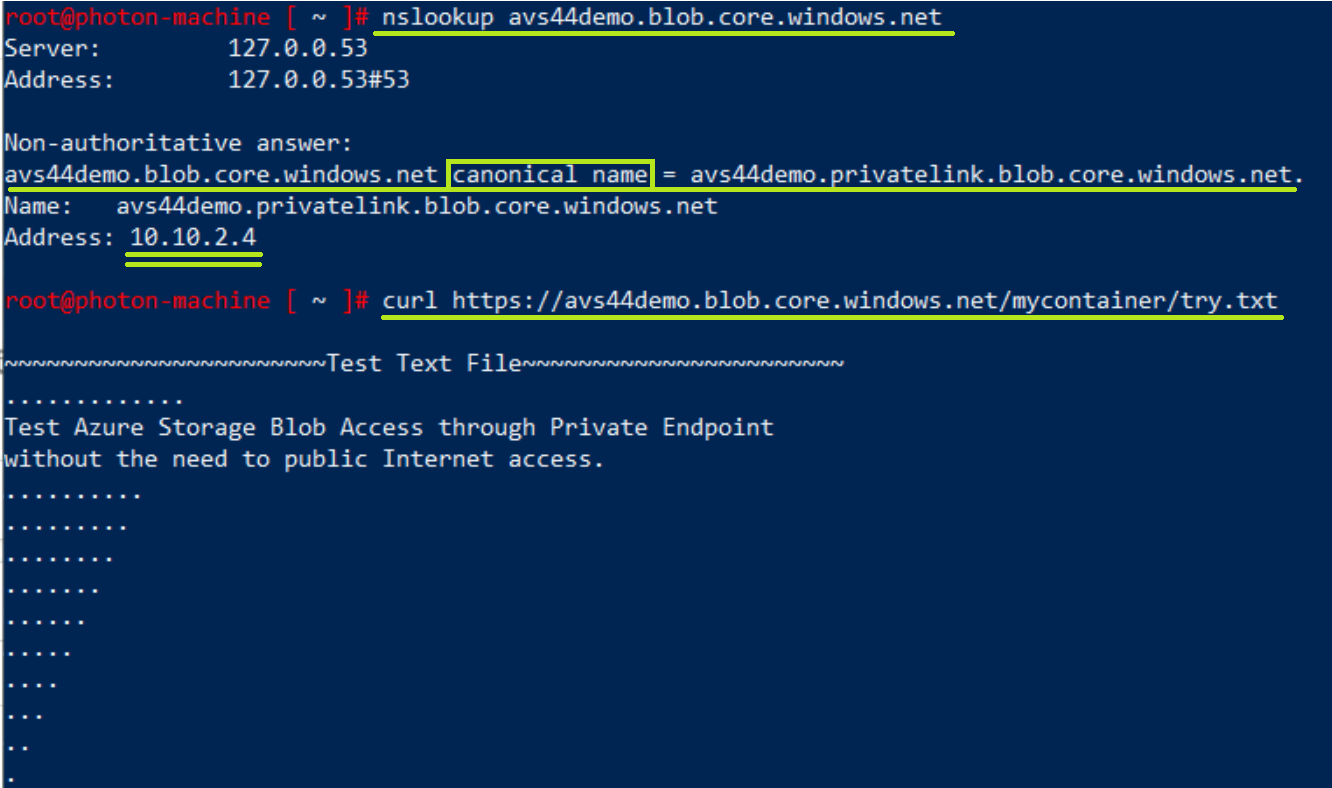
So, if you go back to the VM you created earlier. Try to run nslookup to the Storage Account URL, you’ll notice that you are getting back the Private Endpoint IP, that IP is an internal IP belongs to the PrivateLinkIntegration Subnet in AVS-vNET.
nslookup avs44demo.blob.core.windows.net
-
You can also do curl to the blob URL and see that you can view the content, where if you access the URL from your workstation browser, you’ll not be able to get to it.
curl https://avs44demo.blob.core.windows.net/mycontainer/try.txt
-
This is what you get when you try to access the URL from your workstation (or any device outside of your AVS Private Cloud scope)

-
As you just noticed, from a VM hosted on AVS you were able to retrieve a blob privately and securely from Azure Storage account without exposing the Storage account to the Internet. Of course, that came out as a result of integrating with Azure Private Endpoint, Private DNS Zones and the DNS Forwarding mechanism you configured in previous lab.
The good news, this is not exclusive to Storage Account. You can do the same with other Azure Services like, Azure SQL, Azure KeyVault, Azure Monitor, Azure Automation Account, etc.… (basically any service that has an integration with Private Endpoint).