AVS HOL LAB6 – Deploy a virtual machine on Azure VMware Solution
With your Azure VMware Solution Private Cloud deployed and configured the next step would be to deploy a virtual machine on it.
You can do that in two ways, create the VM and install the operating system manually or use an OVF/OVA appliance. You can follow this link to learn more about OVF (Open Virtualization Format)
For this lab you will use an OVA appliance since it is faster and easier. You are going to deploy a Photon OS, which is a VMware owned and developed Linux distribution. That can be done in two ways:
-
Deploy the OVA directly using a URL as a source. (See Appendix)
-
Deploy the OVA from Content Library.
It’s up to you to decide which way you want to proceed with. The natural flow is to deploy from the Content Library since you already added the OVA to it in the previous lab. But you are welcome to deploy from URL directly (see appendix). After you start the deployment Wizard, the steps are common between both methods as you will see.
Deploy VMware Photon OS OVA Content Library
-
There are two ways to start this, by first going to vCenter portal from the Jumpbox:
- Start from the Content Library.
-
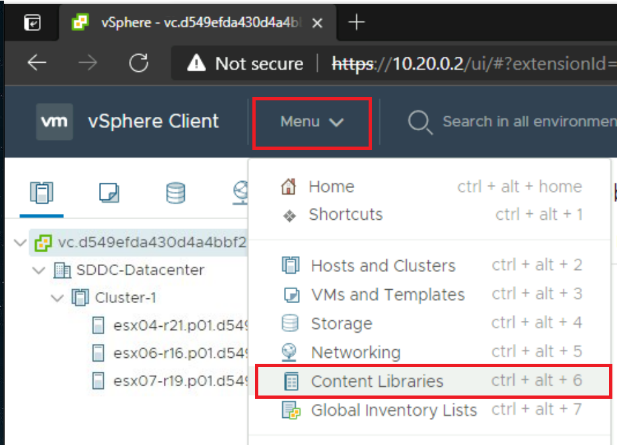
In the vCenter portal, click on Menu and select Content Libraries.
-
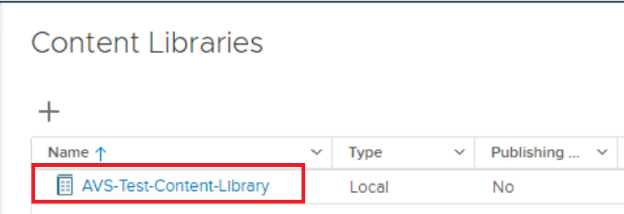
Select the Content Library that you want to take the OVA/ISO from, as you see below:
-
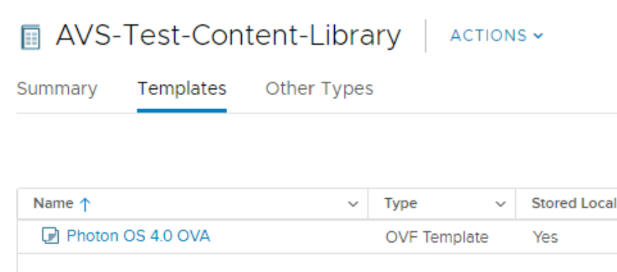
Select the OVA. For example: Photon OS 4.0 OVA
-
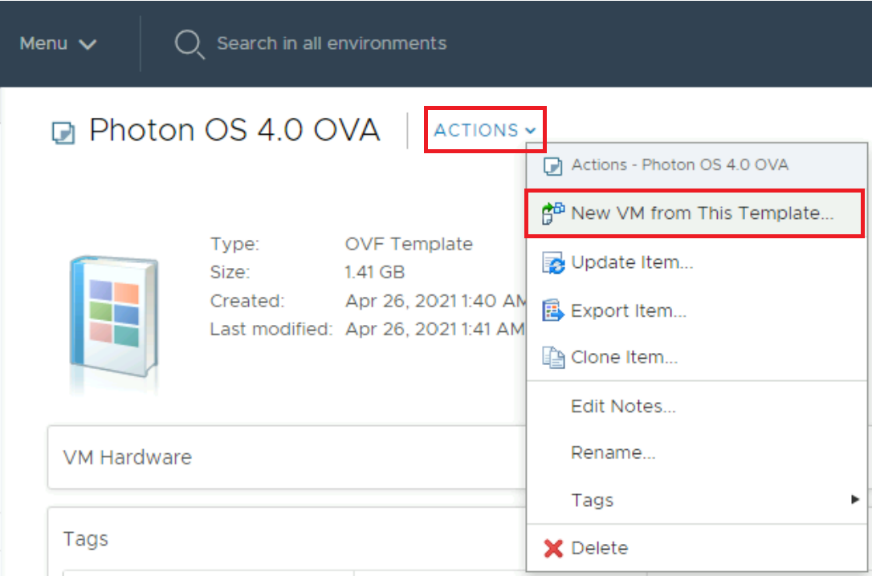
Go to Actions and select New VM from This template.
-
-
Or, from the Hosts & Clusters page.
-
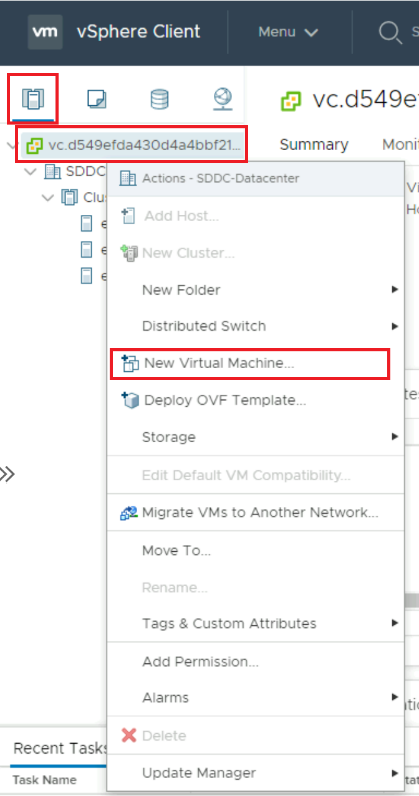
Right click on the Private Cloud and select New Virtual Machine.
-
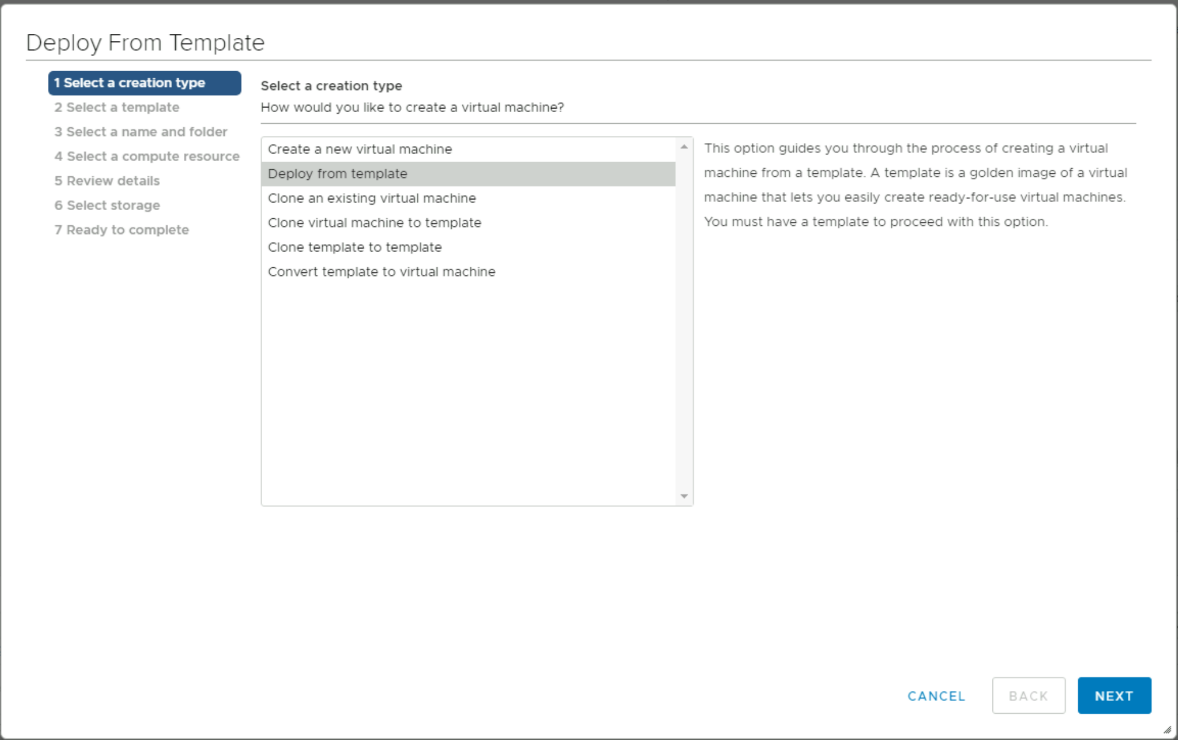
Select Deploy from template
-
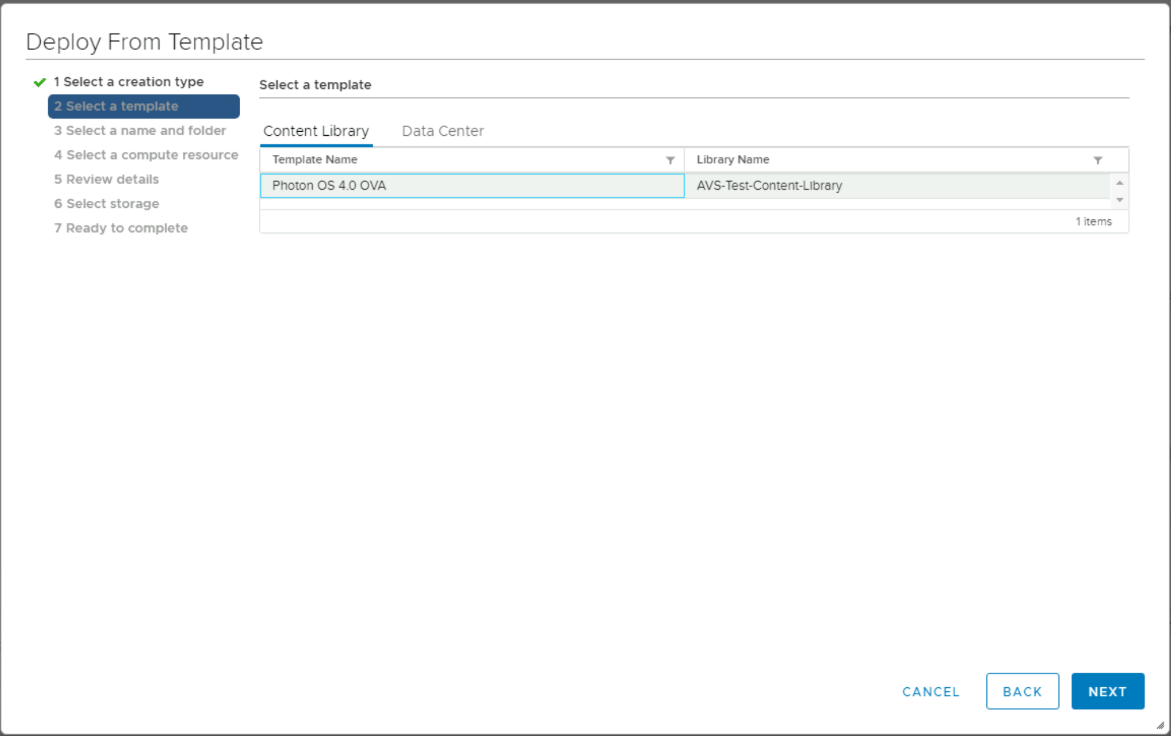
Specify the template. For example: Photon OS 4.0 OVA
-
- Start from the Content Library.
-
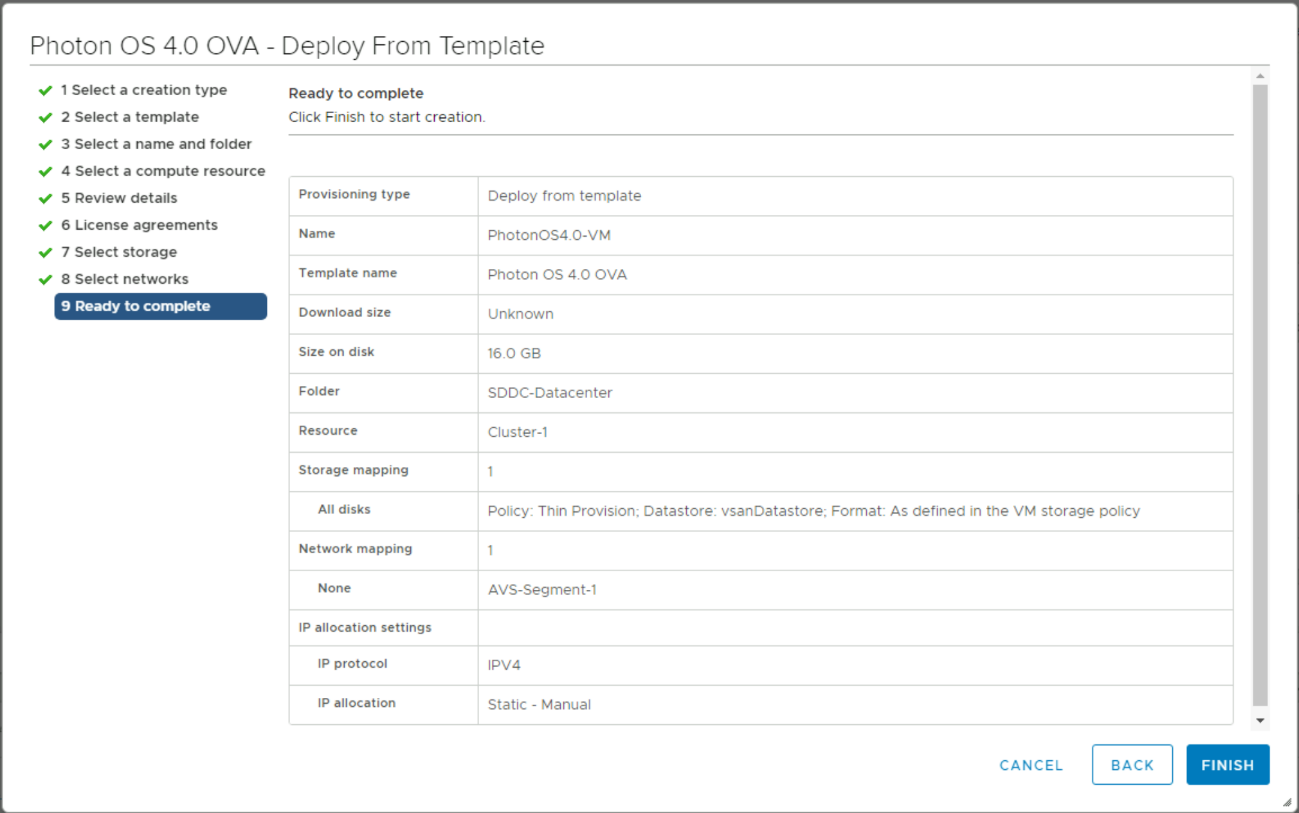
Provide the VM Name. For example: PhotonOS4.0-VM and select which data center you want to deploy the VM at (i.e., Location). Click Next.

-
Select the compute resource, i.e., Cluster-1 and click Next.

-
Review details, click Next.
-
Accept License agreement, click Next.
-
Select the VM Storage Policy, change it to Thin Provision, then click Next.

-
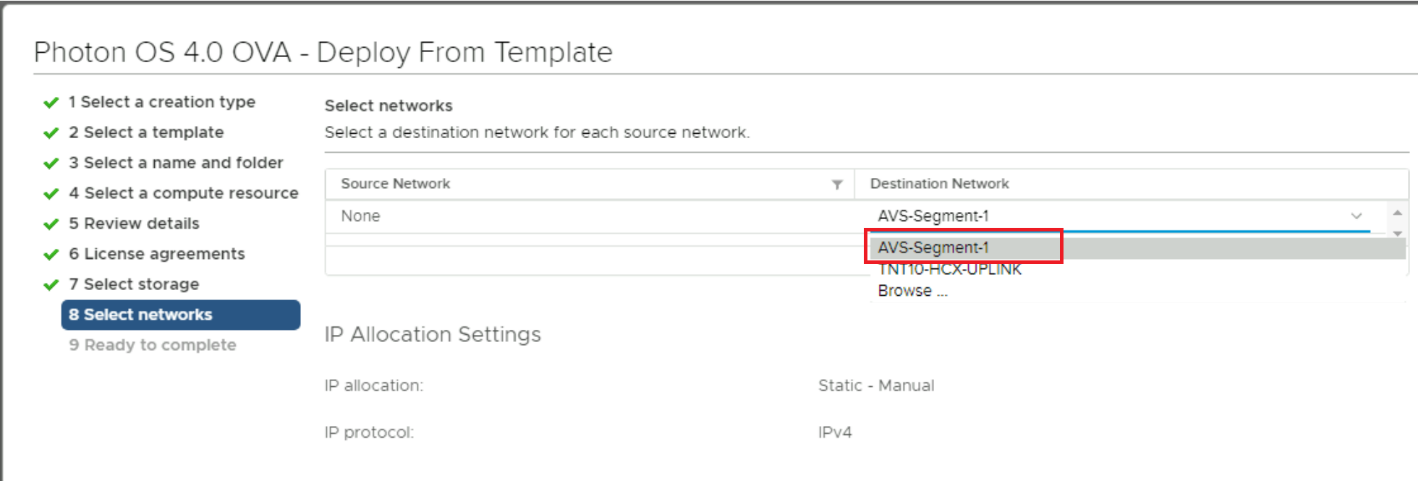
In the Select networks step, select the segment you’ve created previously as your Destination Network. In this example: AVS-Segment-1. Then click Next.
-
Review details and then click Finish to start creating the actual VM.
-
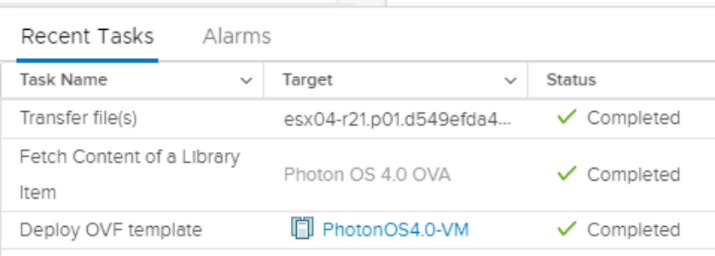
You’ll notice the following in the Recent Tasks area:
-
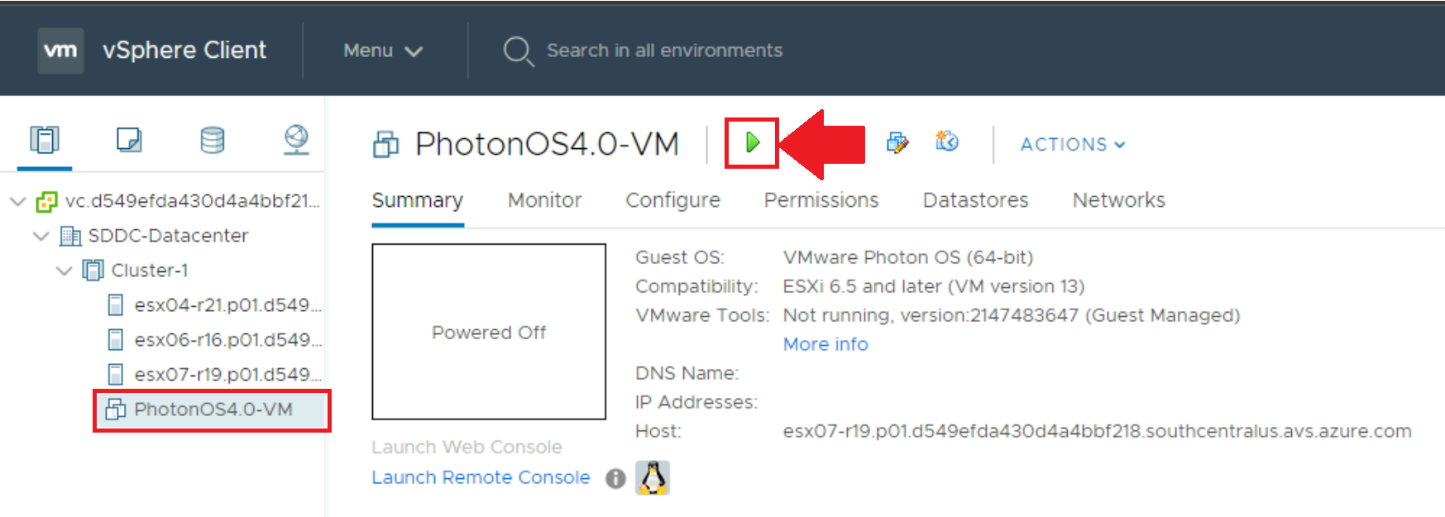
Now the VM should be ready, and you will need to start it. Click on the green run button ▶
-
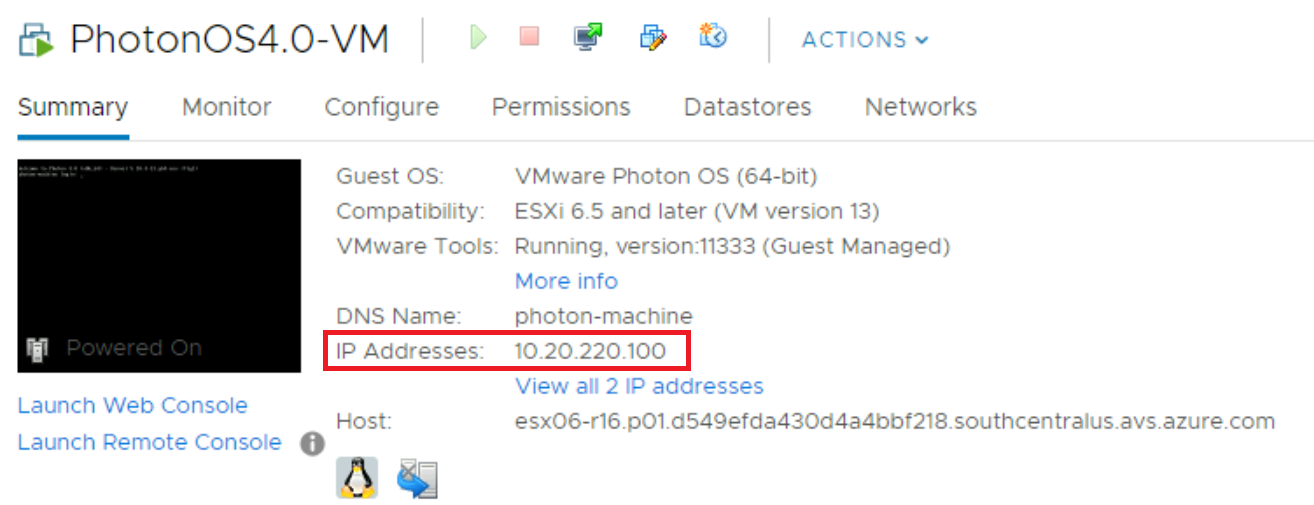
Once the VM is running, you’ll notice the IP Address will be assigned to the VM. Copy that IP address as you’ll use it to SSH into the VM.
-
Open PowerShell from the Jumpbox machine and run the following command to SSH into the created VM. The PhotonOS gets a default password for the root account, which is: changeme
You’ll be prompted to change it the first time you SSH into the VM. Please remember that password as you may need it in other exercises. The command is: ssh root@10.20.220.100![vm change password]](/PartnerResources/assets/avs-hands-on-labs/lab-6/vm-change-password.png)
-
Update the VM, by running the command:
tdnf update

-
To install nslookup utility use the command:
tdnf install bindutils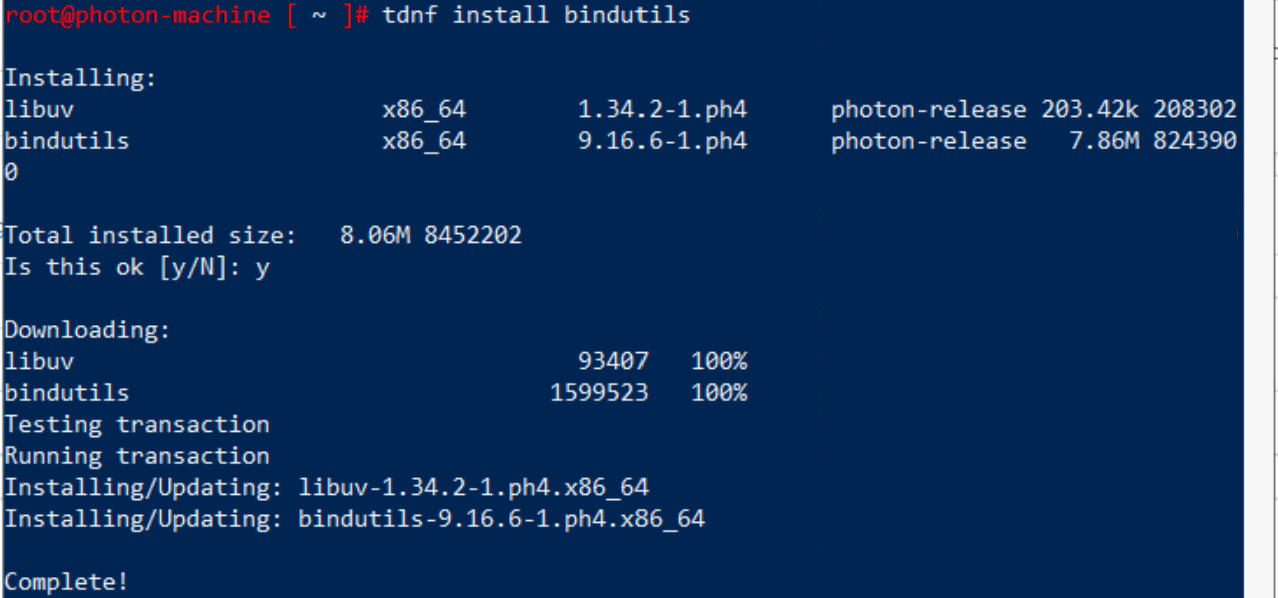
-
Test Internet Connectivity and DNS functionality, run:
nslookup www.bing.comthen:
curl www.bing.com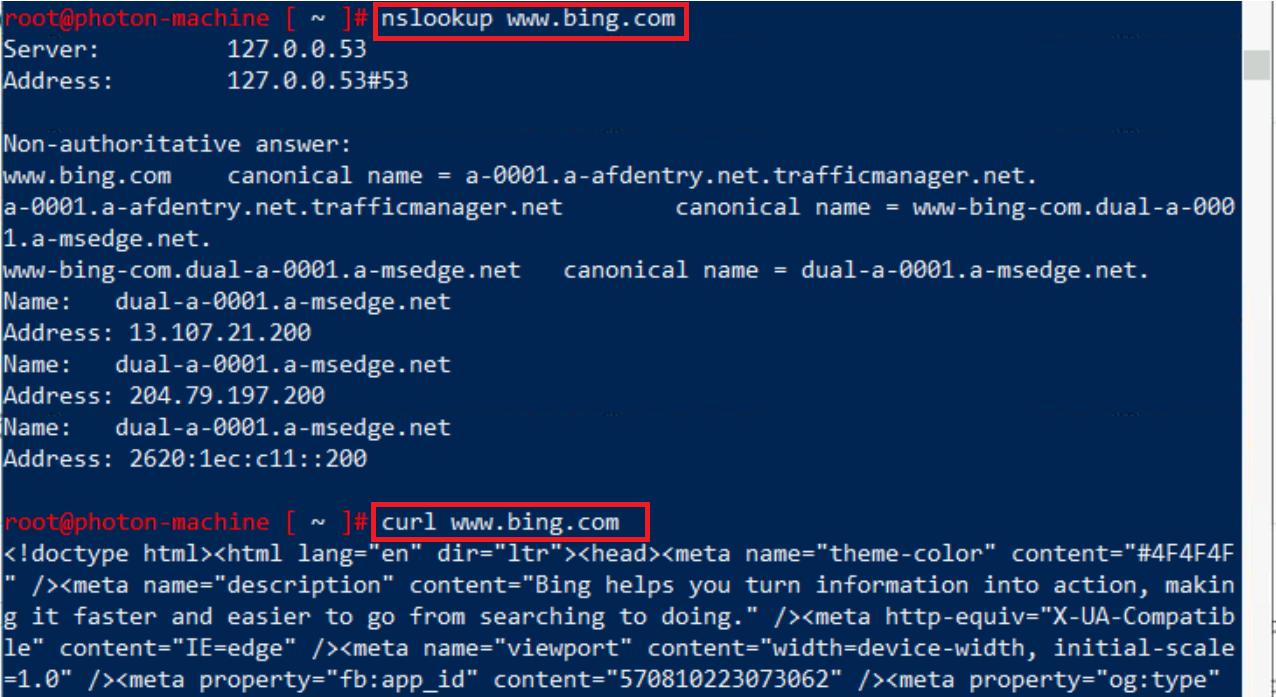
**You will notice that you can reach the Internet from the VM, and resolve Internet URLs to IP addresses.
** -
Follow these steps to run Nginx Web Server container on Photon OS. These steps were derived from this article Run NGINX and NGINX Plus in Containers on Photon OS. This step is important and considered as a prerequisite for upcoming two labs:
-
Connect from Azure Application Gateway to AVS hosted workload.
-
Assign Public IP to virtual machine on Azure VMware Solution.
Run these commands to run NGINX Web server container:
 systemctl start docker
 docker run --name mynginx -p 80:80 -d nginx
 curl localhost:80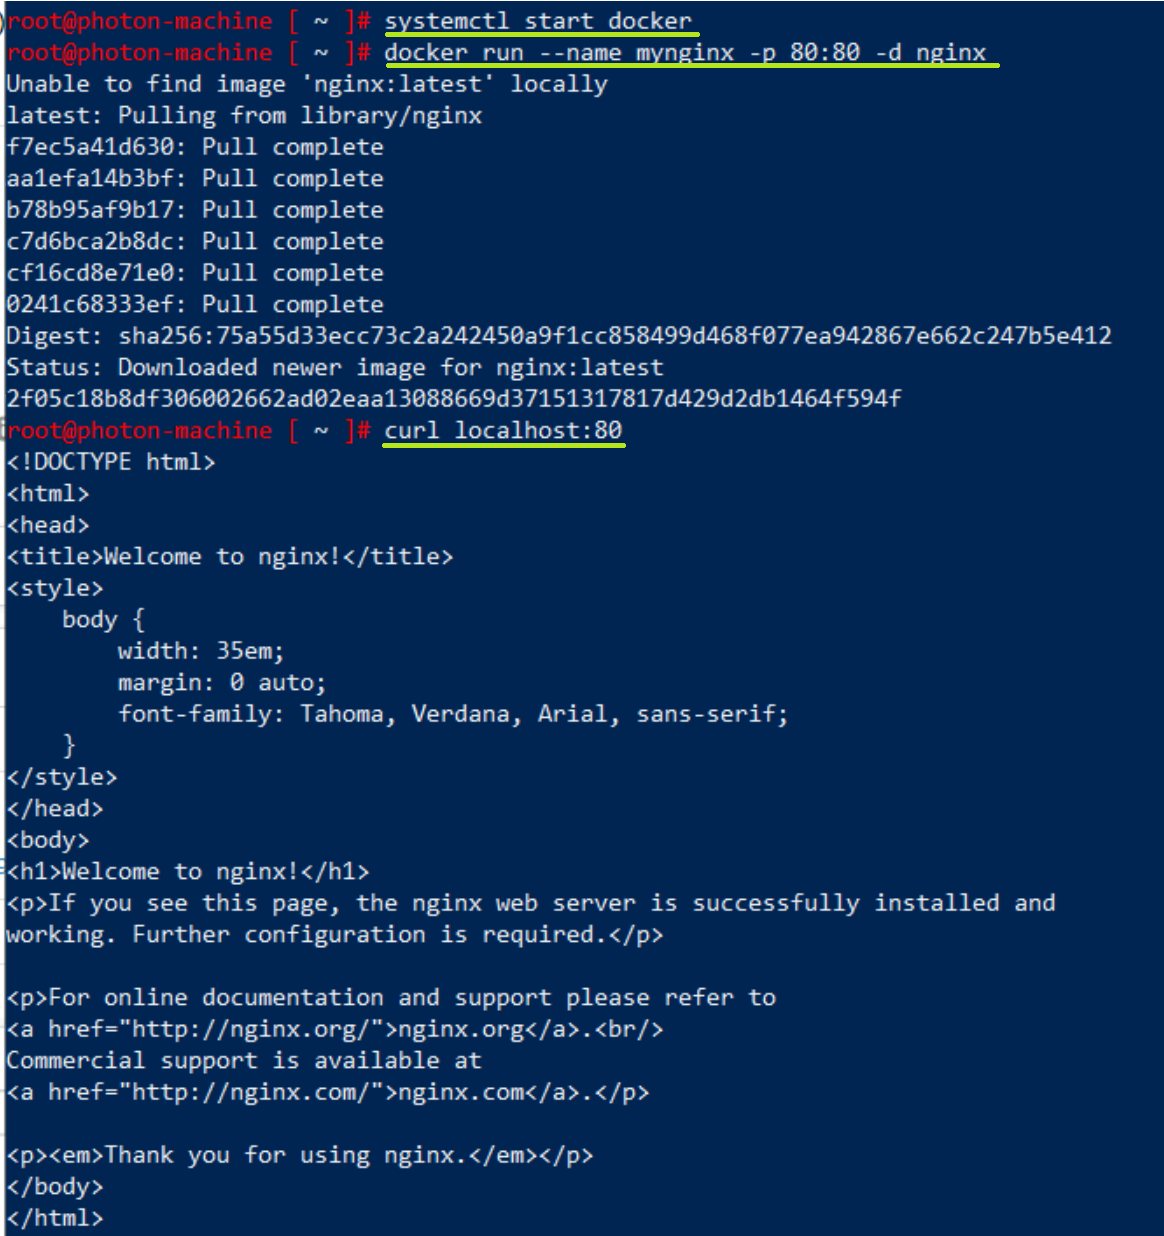
-
Now the VM is ready for the upcoming labs, where you’ll public this webserver to the Internet in two different ways, as you’ll notice.