AVS HOL LAB14B – Create a remote content library in Azure Blob Storage
Azure Blob Storage can be leveraged as the storage backend for a content library, freeing up space in the vSAN datastore for the workloads. Also, a Blob Storage backed content library can be share across different SDDCs running on Azure VMware Solution.
Prepare the content and folder structure
The first task would be to build the content for the library in local disk, for this you will use the Jumpbox. Access Photon OS download page on https://github.com/vmware/photon/wiki/Downloading-Photon-OS and download the OVA file for Photon 3.0 and the Minimal ISO for x86_64.
Create folder in C:\ with the name BlobStorageLibrary. Create a Photon30-ISO folder and a Photon30-OVA folder and move there from your Downloads folder the ISO and the OVA files, respectively.
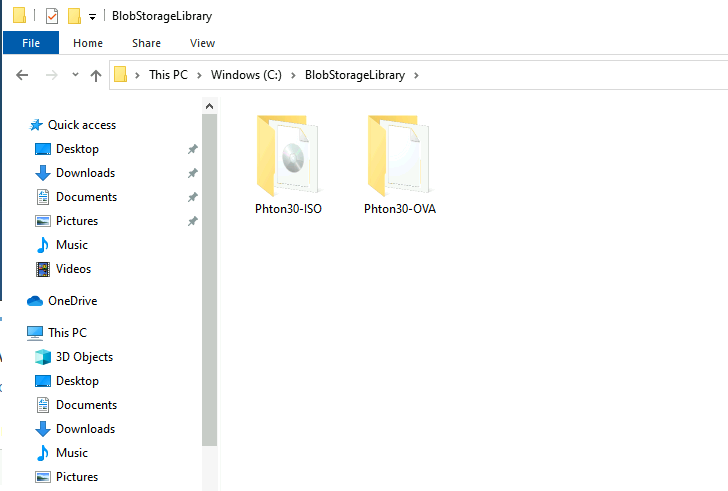
Prepare the content library in the Jumpbox
To build the content library itself on local disk you will need a to run a Python script, the script can be get from GitHub.
Download and install the latest version of Python for Windows, make sure you select the option to get Python in the PATH. Once Python installation has finished open a CMD terminal session and run the script with the following parameters.
python make_vcsp_2015.py <library name> <library location on disk>
For example:
C:\>python make_vcsp_2015.py BlobStorageLibrary C:\\BlobStorageLibrary
Check the content library content and you will see tow JSON files:
-
items.json
-
lib.json
Also, there is an item.json file on each folder.

Create Azure Blob Storage infrastructure
You are going to create now all the Azure Storage resources that will contain the new content library. Access Azure portal and search for Storage accounts. Click on Create.
In the first screen enter the name, select the resource group, or create a new one and the Location. For Account kind select StorageV2 (General purpose v2) and set Replication to Locally-redundant storage (LRS).
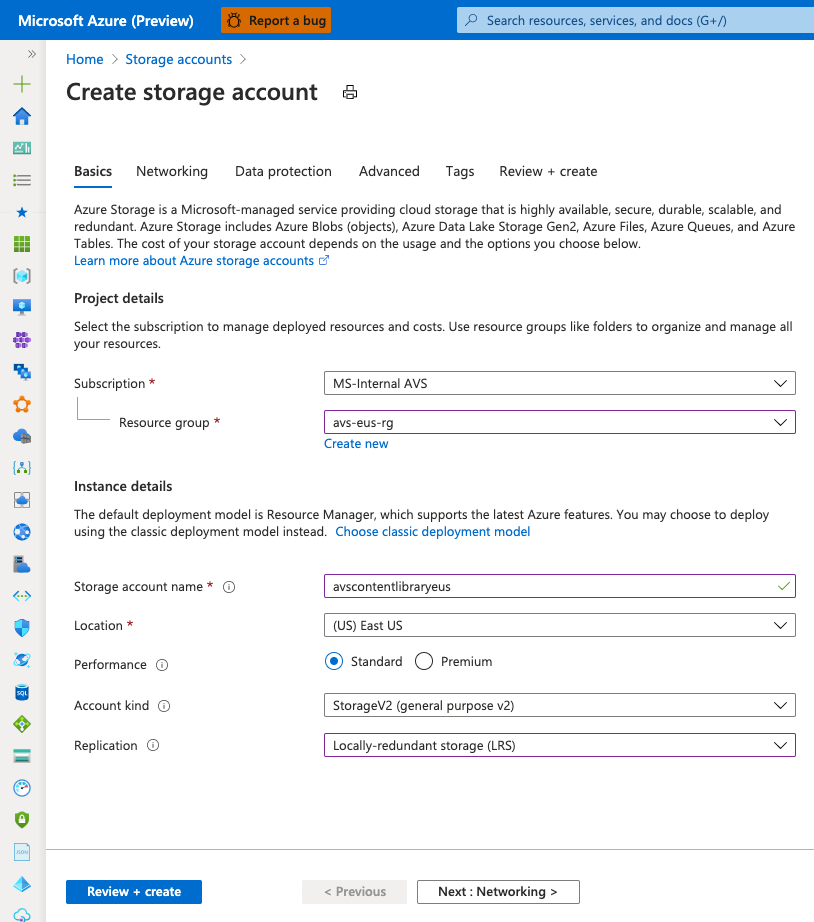
Leave the rest of the parameters with the default values and go to the Review + create screen and select Create.
Upload the content to Blob Storage
Download and install Azure Storage Explorer application, you are going to use it to configure the storage account and upload our library.
Launch Azure Storage Explorer, in the Add an Azure account screen login with your Azure credentials and select your Azure subscription.
Expand your storage account, right click on Blob Containers, and select Create Blob Container. Enter the name for the container.
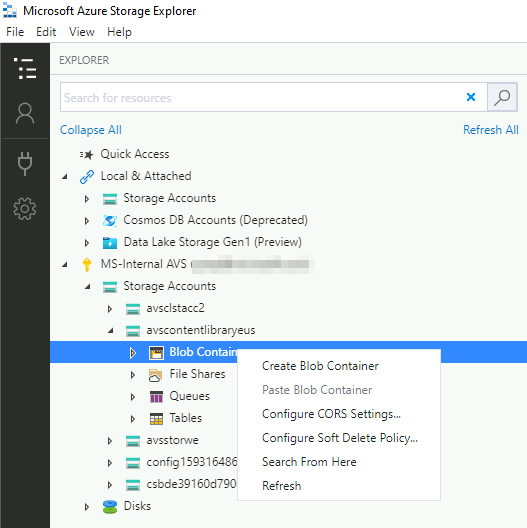
Select the new container and in the right are click on Upload > Upload Folder and select the local folder containing the library.
After the upload is finished access the folder and right click on the lib.json file and select Copy URL.
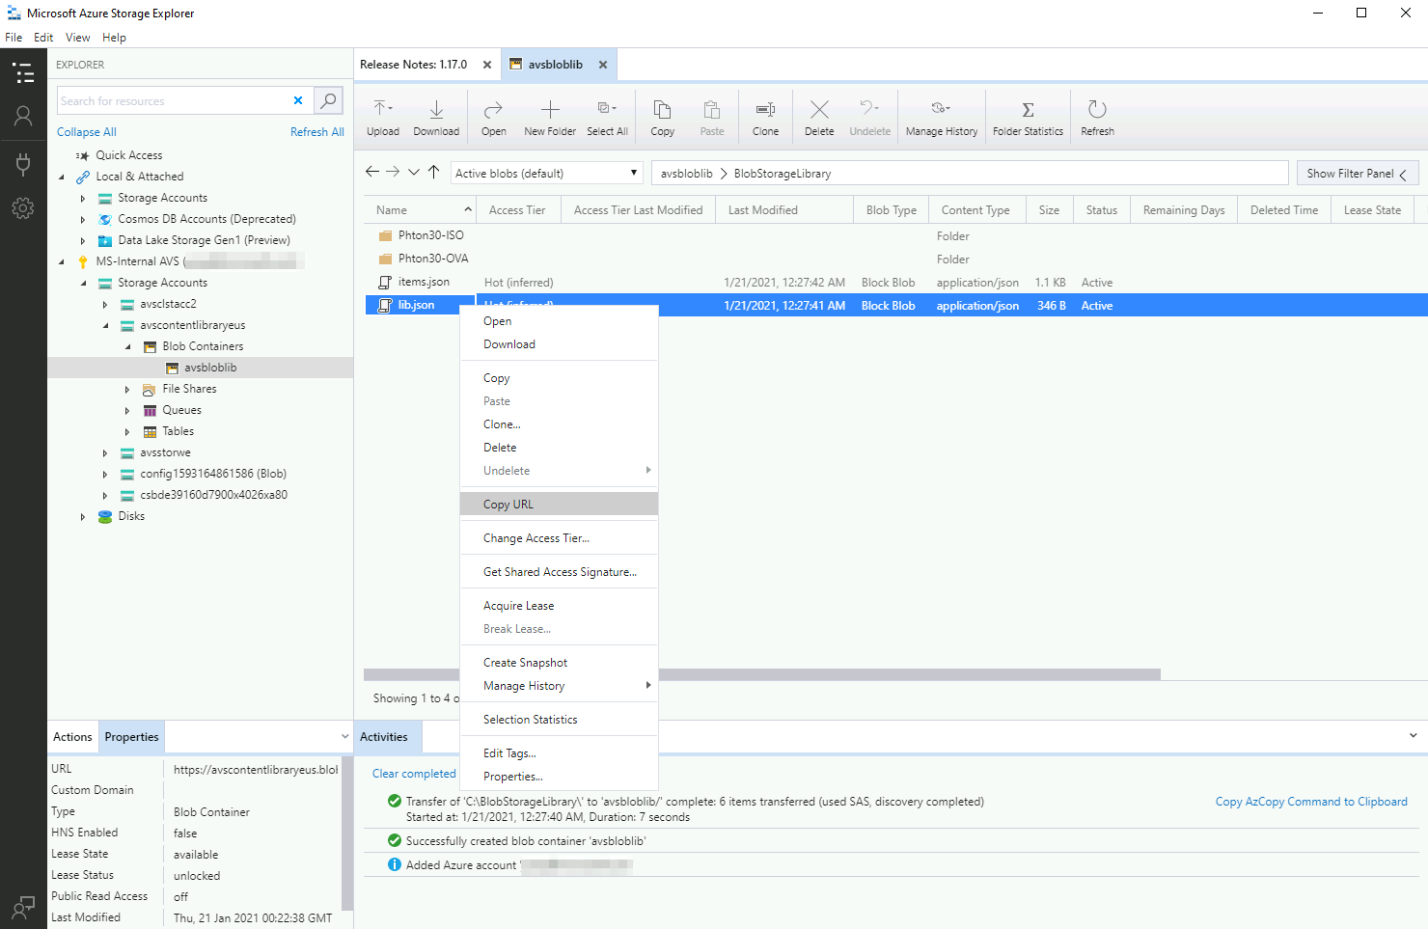
By default, the access level of a blob container is set to Private, before creating our content library you will need to change that access level. The recommended way is to setup proper access and authentication to access the blob container but for the purposes of the lab you will give it anonymous read access level.
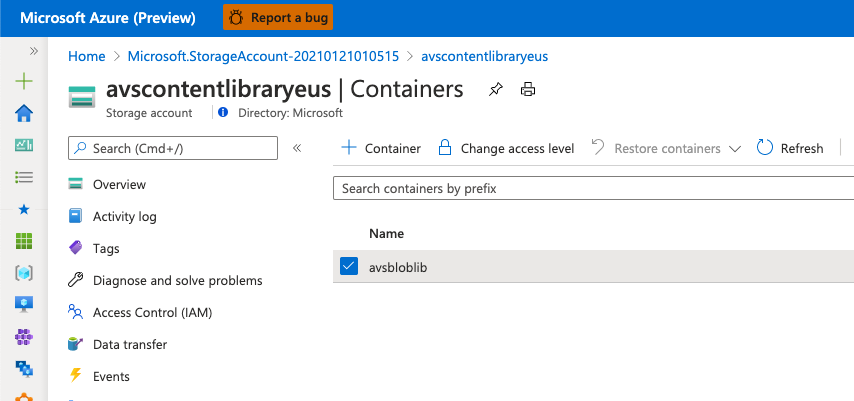
Access Azure portal and go to your storage account. Go to Containers, select you blob container and click on Change access level.
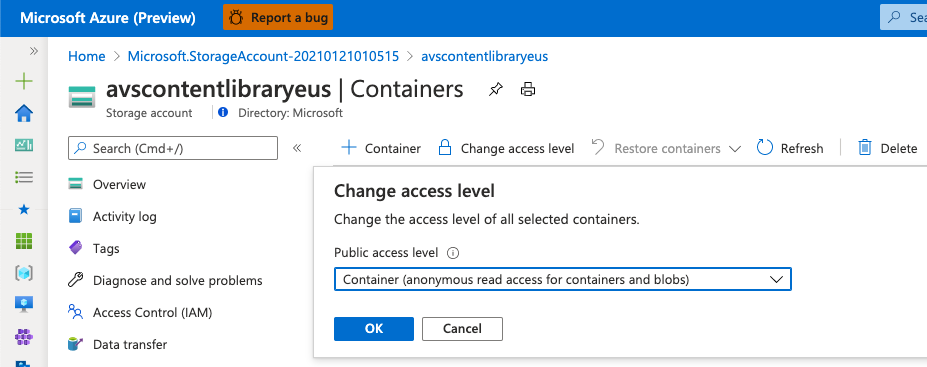
Set the Public access level to Container (anonymous read access for container and blobs) and click OK.
Create the content library in AVS vCenter
Access vCenter and in the drop-down menu select Content Libraries. Click on Add. Enter the name for the library and select the AVS vCenter Server.
In the Configure content library screen select Subscribed content library and paste the URL you copied from Azure Storage Explorer.
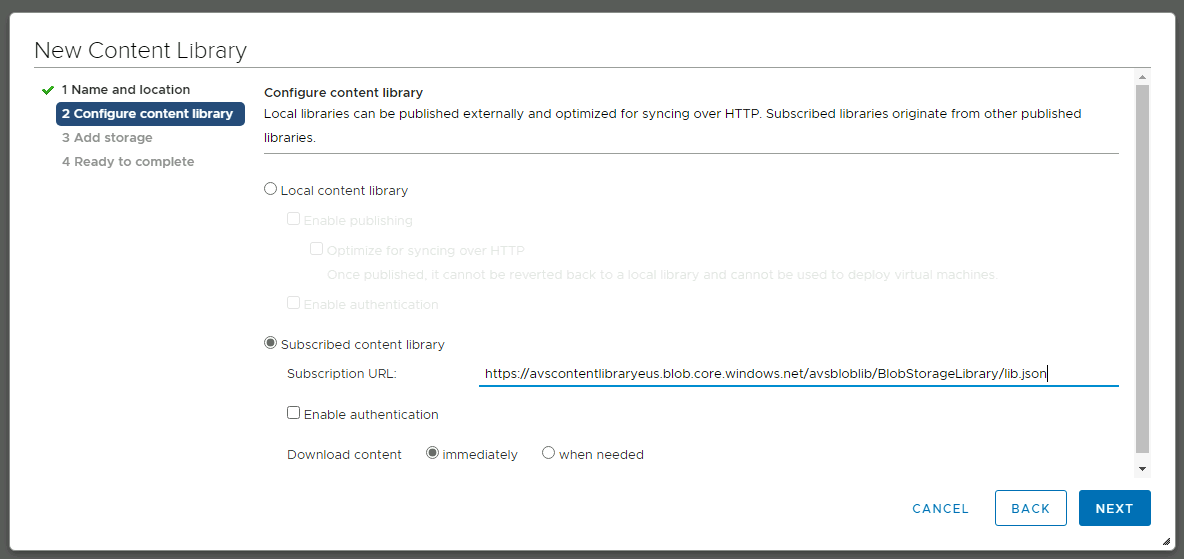
Finish the creation process of the content library as with the local one. If you have selected download content immediately, the AVS vCenter Server will download all the templates and ISO files from the library but if you select when needed it will download the content as needed, saving space in the local vSAN datastore.