AVS HOL LAB10 – Connect from Azure Application Gateway to AVS hosted workload
This lab shows you the steps to use Application Gateway in front of a web server farm to protect a web app running on Azure VMware Solution. This will allow using Azure Application Gateway as layer 7 web traffic load balancer that lets you manage traffic to your web applications that are hosted inside AVS Private Cloud. You can refer to the original article: Use Azure Application Gateway to protect your web apps on Azure VMware Solution - Azure VMware Solution | Microsoft Docs
An additional possible step is configuring Azure Traffic Manager to direct traffic between three Azure Application Gateways spanning several Azure VMware Solution regions. As explained in this article: Deploy Traffic Manager to balance Azure VMware Solution workloads - Azure VMware Solution | Microsoft Docs
So, let’s start the steps of configuring a VM hosted in Azure VMware Solution Private Cloud in the Backend Pool of Application Gateway:
-
Go to Azure Portal, search for “Application Gateways”, click on Application Gateways.

-
Click on Add in Application gateways pane, to create a new Application Gateway instance in case you don’t have an existing one.

-
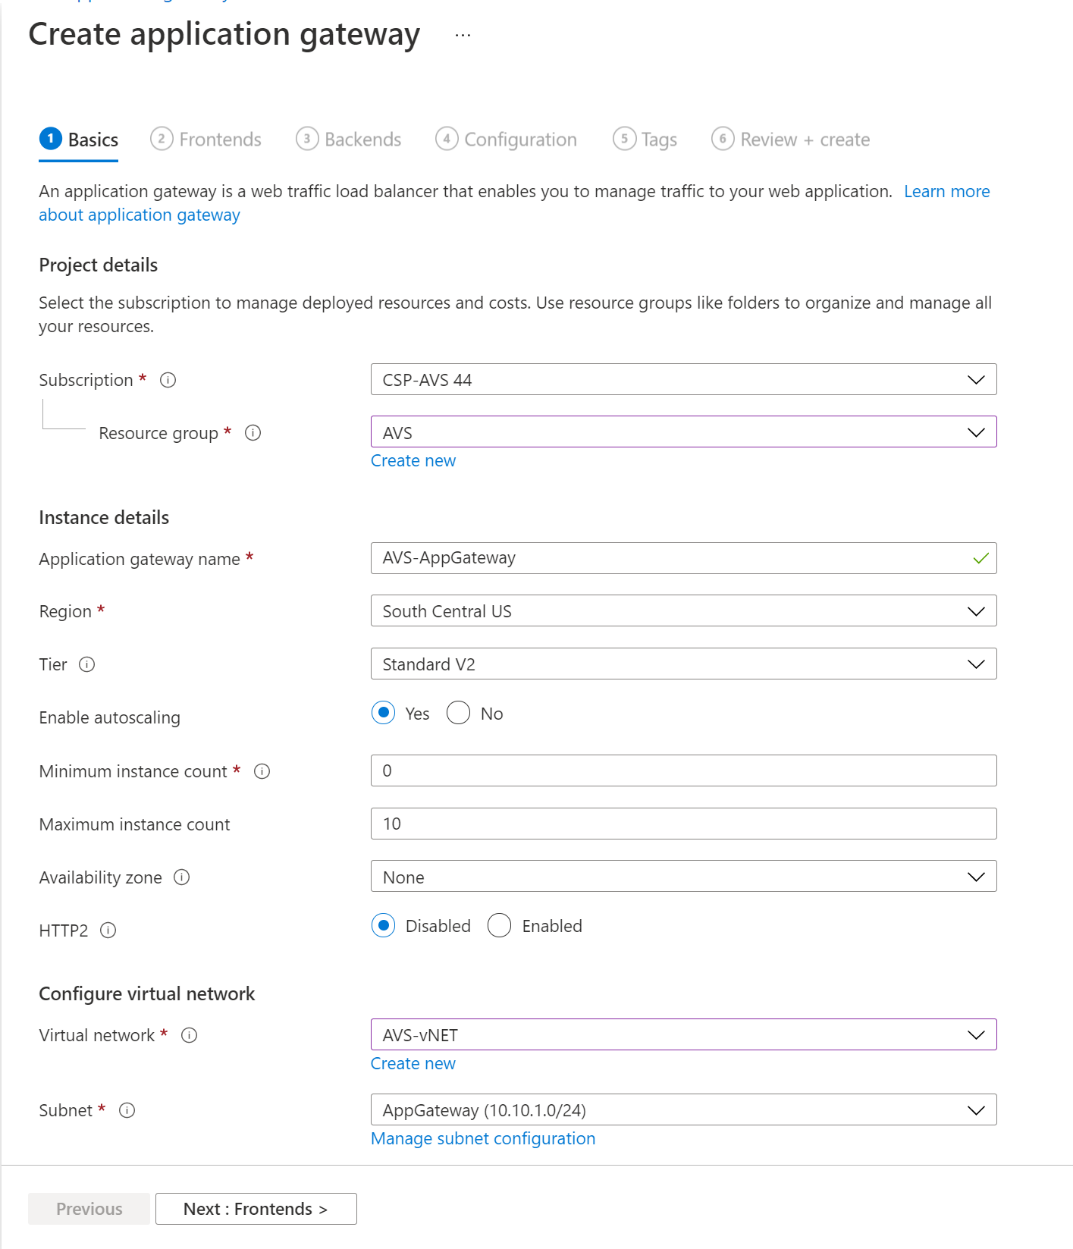
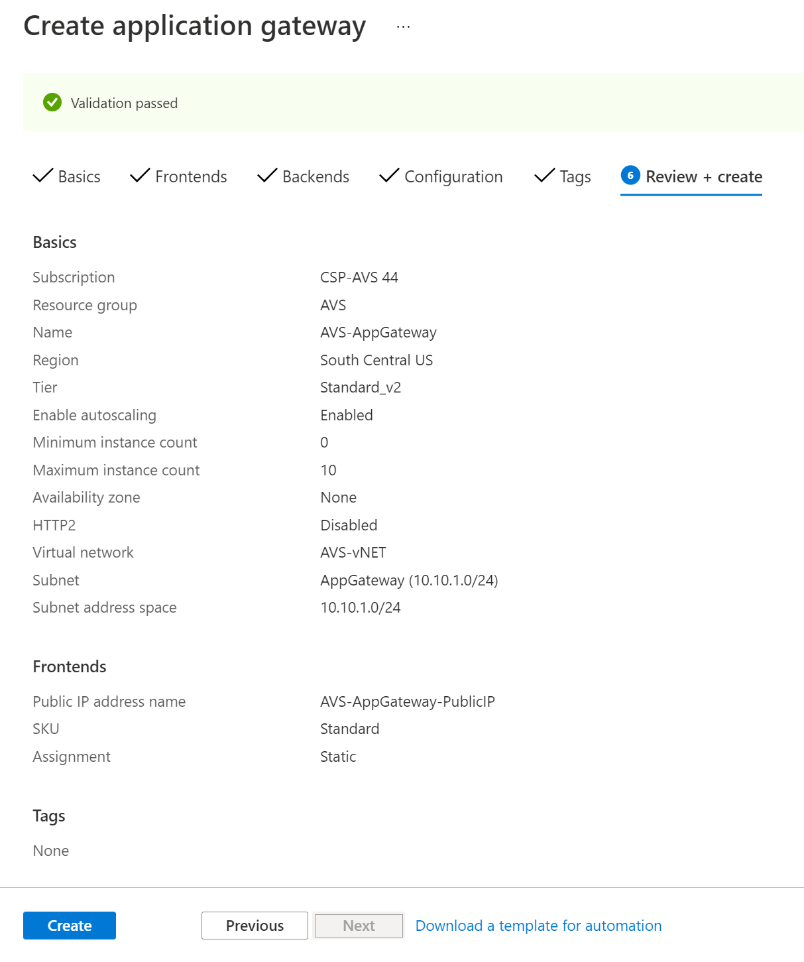
Fill out the main fields at the Basics section to start creating a new Application Gateway, such as Subscription, Resource Group, Name, Region, Tier, Virtual Network and Subnet. Keep the same values in the other pre-populated fields.
-
Note that the Region of the Application Gateway needs to be in the same region of the vNet that’s connected to AVS Private Cloud. In the example below it is South Central US.
-
Note that in this lab the vNet exists and is called AVS-vNET and the subnet for Application Gateway has also been created and called AppGateway which should show up in the drop-down list.
-
-
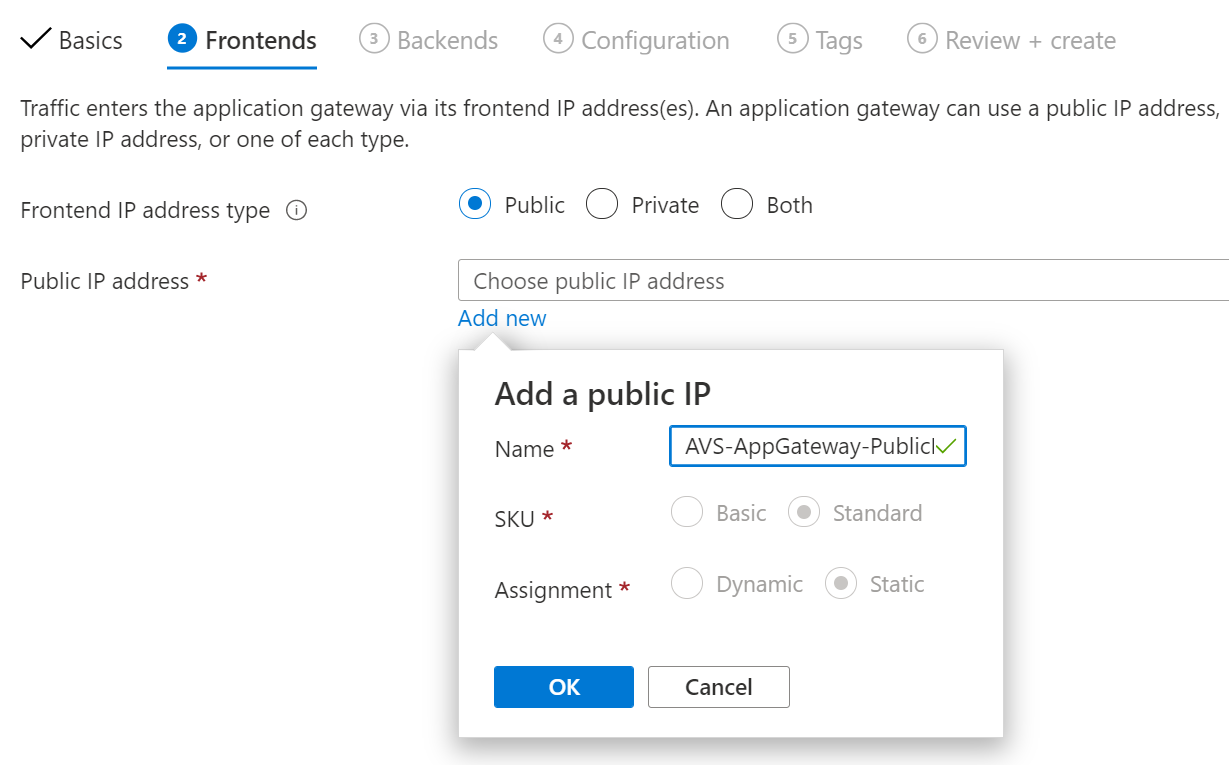
Move to Frontends section and create a new Public IP as you notice in the screenshot below. A suggested name is AVS-AppGateway-PublicIP.
-
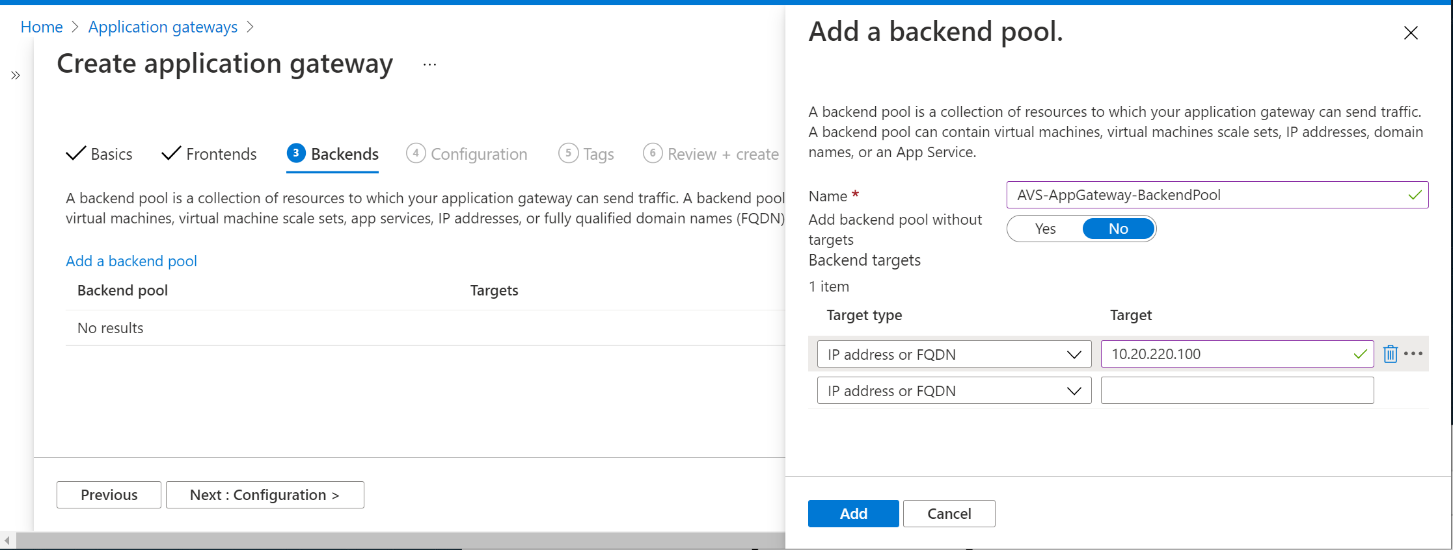
Move to Backends section. Click on Add a backend pool to create a new Backend pool, you can name it: AVS-AppGateway-BackendPool. Next is to populate the IPs of the web server farm VMs hosted in AVS Private Cloud. You can get the IPs from vCenter portal, or from the VMs directly by running ipconfig command in Windows or ifconfig command in Linux based operating systems.
The IP Address you see in the screenshot below should be the same as the IP of PhotoOS VM that you deployed in the earlier lab.
-
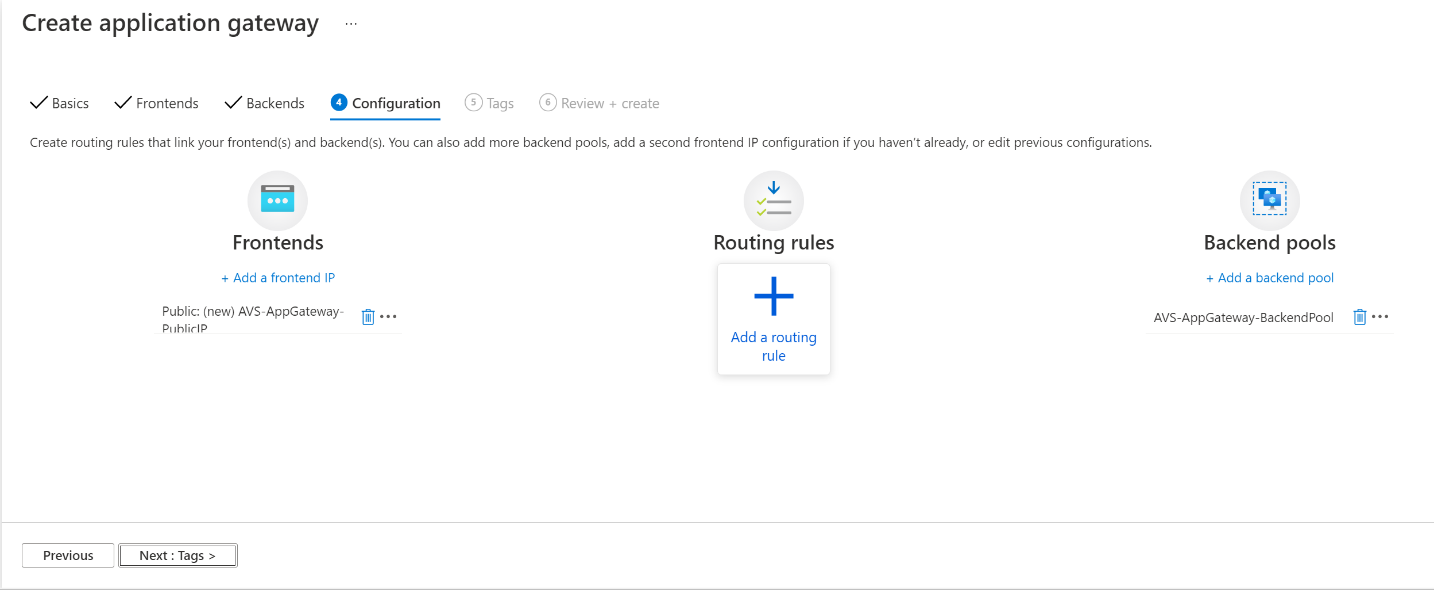
Next, move to Configuration section, where you need to click Add Routing rule to map the Frontend with the Backend pool:
-
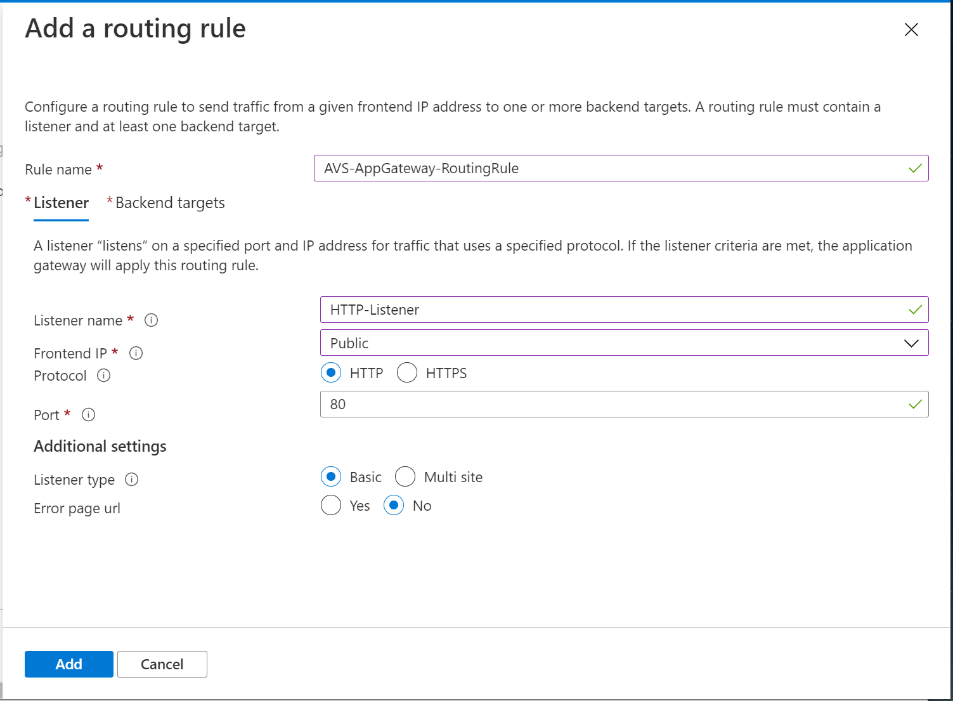
Give the rule a name, i.e.: AVS-AppGateway-RoutingRule.
-
Under the Listener section, add a name for the listener, i.e.: HTTP-Listener,
-
Select Frontend IP: Public, select the Protocol: HTTP (for demo purposes), specify the Port: 80. Keep Additional settings as is.
-
Move to Backend targets section, select Target type: Backend pool, then select the created backend pool in the Backend target. Then create HTTP settings as in the next step.

-
Adding HTTP settings by giving them a name, i.e.: HTTP-Settings, selecting Backend protocol: HTTP, and Backend port: 80. Keep other settings as is. Click Add button, to finish the HTTP settings.

-
After adding the Listener and the Backend targets, you should land again at Add a Routing rule pane. The last step at the Add a Routing rule pane is to click Add button to finish that wizard.
-
-
Now, move to Review + Create section and click on Create button, as you see in the screenshot below.
-
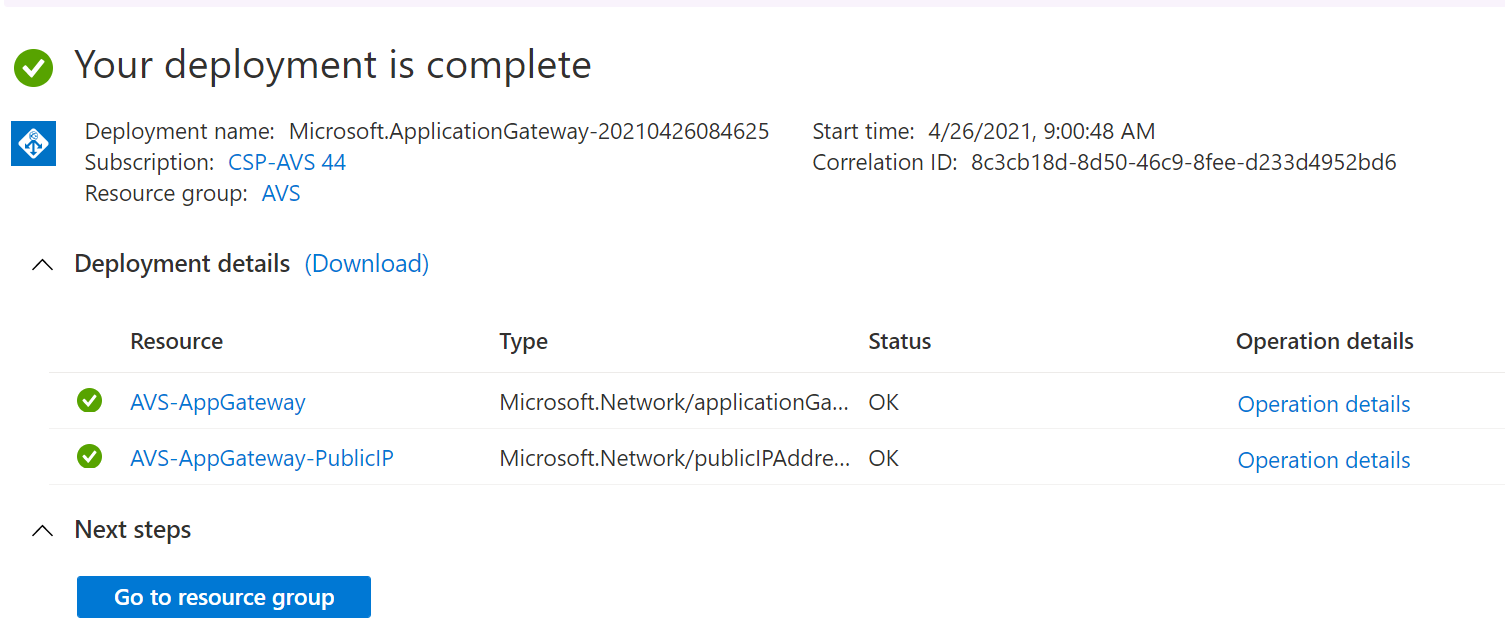
Creating an Application Gateway takes about 15 minutes to complete.
-
Go to the created Applicate Gateway by clicking on its name as shown in the previous step, i.e., AVS-AppGateway. Notice the Frontend public IP address. Copy IP value. **
**
-
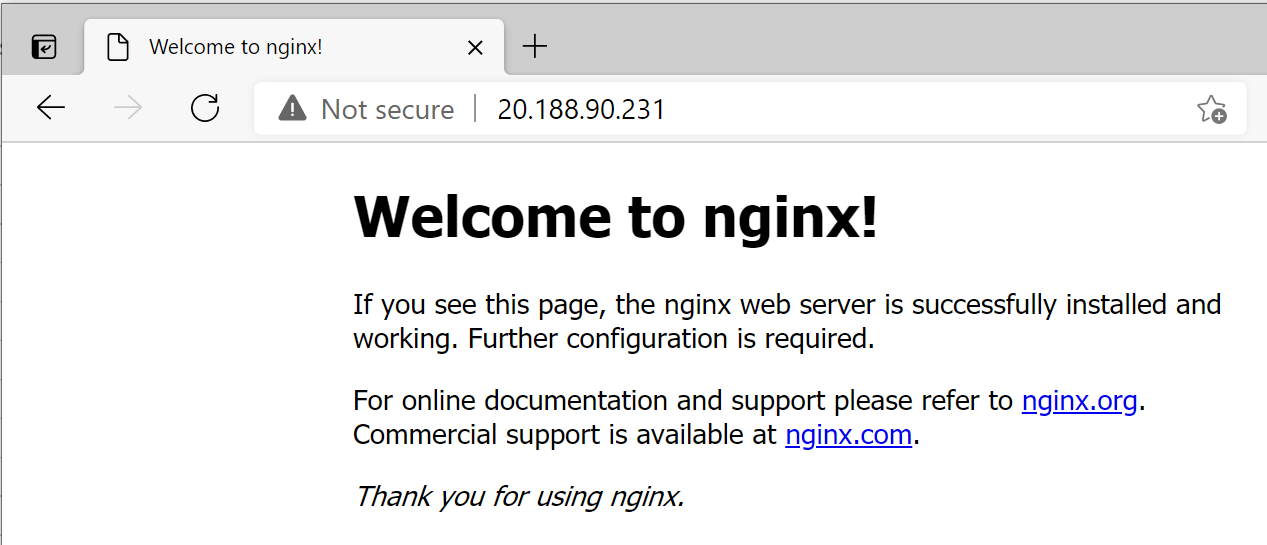
Open a new Internet browser (Edge/Chrome) tab and put the IP in the address bar with ‘http://’ prefix,
i.e.: http://20.188.90.231Notice now that you can access the web application hosted at the web server farm that is hosted in AVS Private Cloud, in this case it’s the default Nginx page.
