Appendixes
APPENDIX 1 – Azure VMware Solution Deployment
The content in the appendix is added for reference in case you do have enough time to do the AVS deployment yourself. You can in that case substitute LAB1 with the content below.
You will deploy your AVS Private Cloud. This operation will take a minimum of two hours so it’s better to launch it now and leave it deploying while you go deeper into the AVS components and architecture.
Prerequisites
Before deploying your AVS Private Cloud, keep in mind that you will need the following:
-
Azure account with an active subscription (of type CSP or Enterprise Agreement).
-
Appropriate administrative rights within the subscription to create a Private Cloud.
-
A /22 network address segment to be used by the AVS management components, which does not overlap with any other Azure or on-premises network.
- The permitted ranges are the RFC 1918 private address spaces (10.0.0.0/8, 172.16.0.0/12, 192.168.0.0/16), except for 172.17.0.0/16.
There is no need to provide passwords for vCenter cloudadmin and NSX-T admin user, the deployment process will generate random passwords for both users that can be retrieved securely later from the Azure portal.
Create a Private Cloud
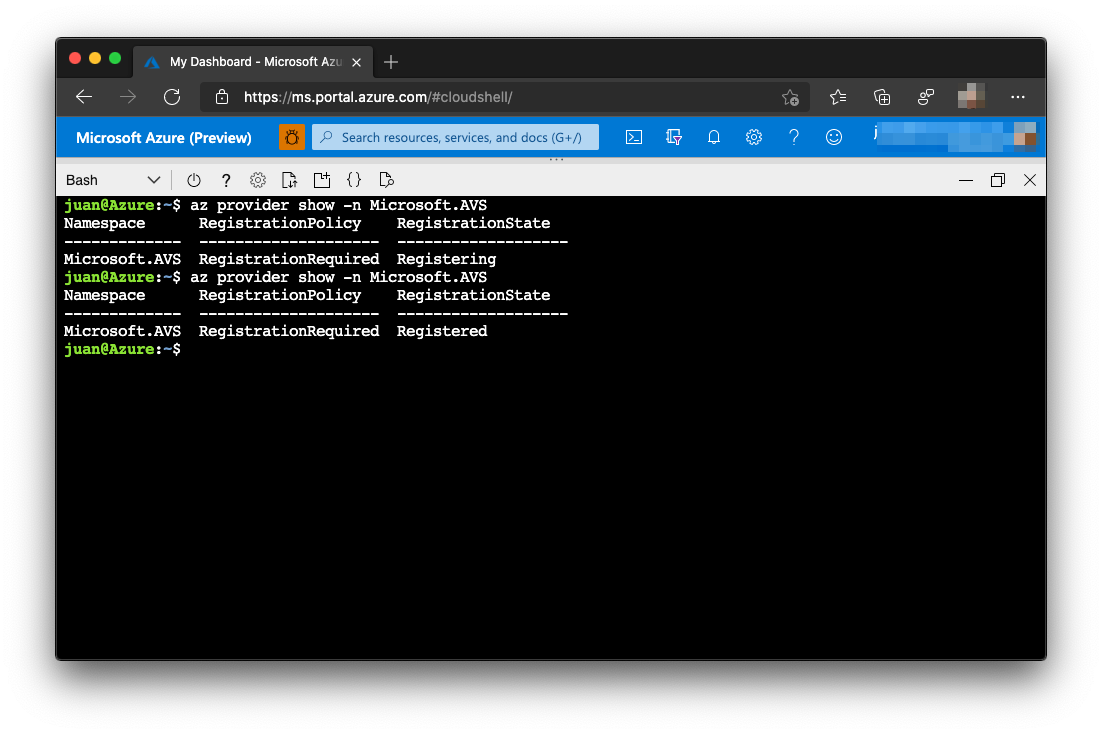
To be able to deploy an AVS Private Cloud you will need to register the AVS resource provider first. From Azure portal open Azure CLI or in another browser tab navigate to https://shell.azure.com.
In the shell, enter the command:
az provider register -n Microsoft.AVS --subscription \<your subscription ID\>
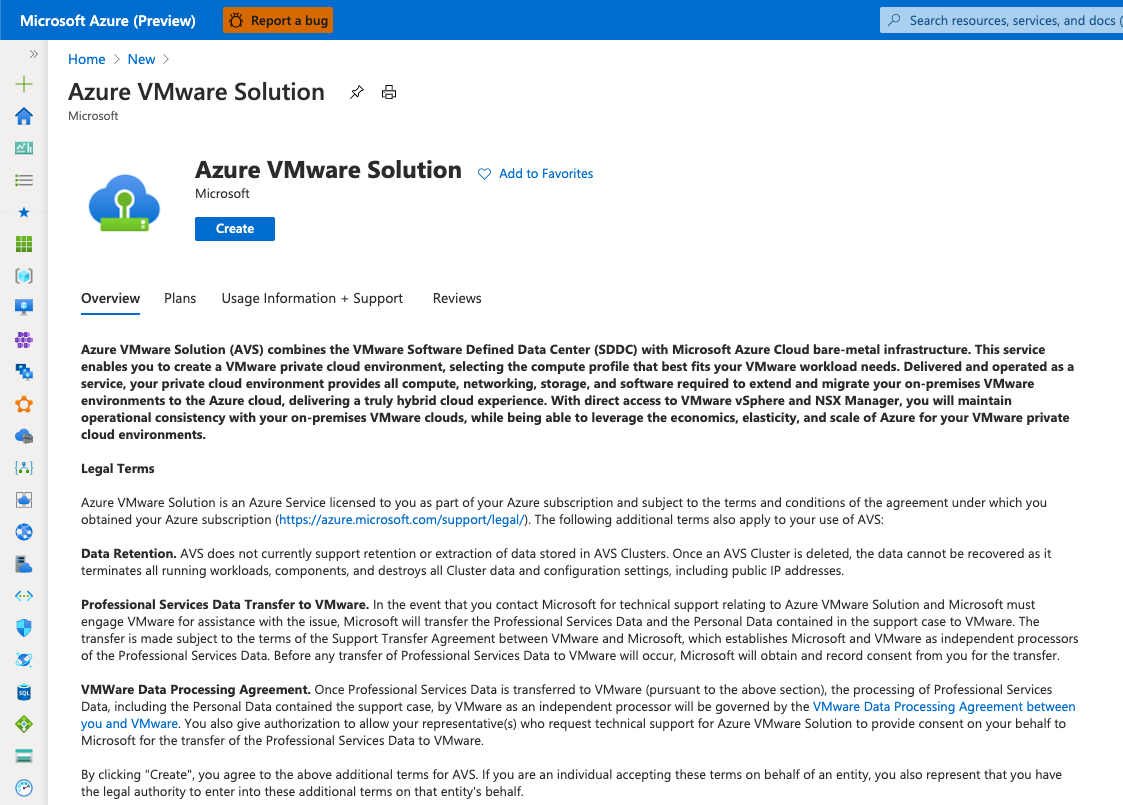
In the Azure portal select Create a new resource and search for Azure VMware Solution, in the AVs window select Create.
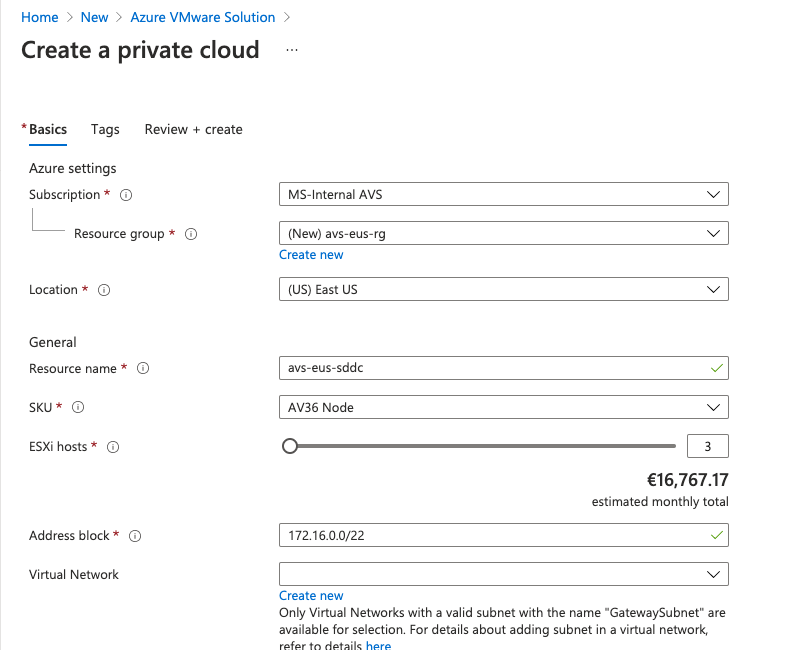
In the Create a Private Cloud window fill in the needed parameters.
-
Subscription.
-
Resource group. Create a new RG or select an existing one.
-
Location.
-
Resource name.
-
SKU. AV36 is the only one available today.
-
Number of ESXi nodes, move the slide or enter the number. See how the cost gets updated as new nodes are added or removed. As discussed begore the minimum supported is 3.
-
Address block required for the AVS management components. The /22 CIDR network segment from the prerequisites.
-
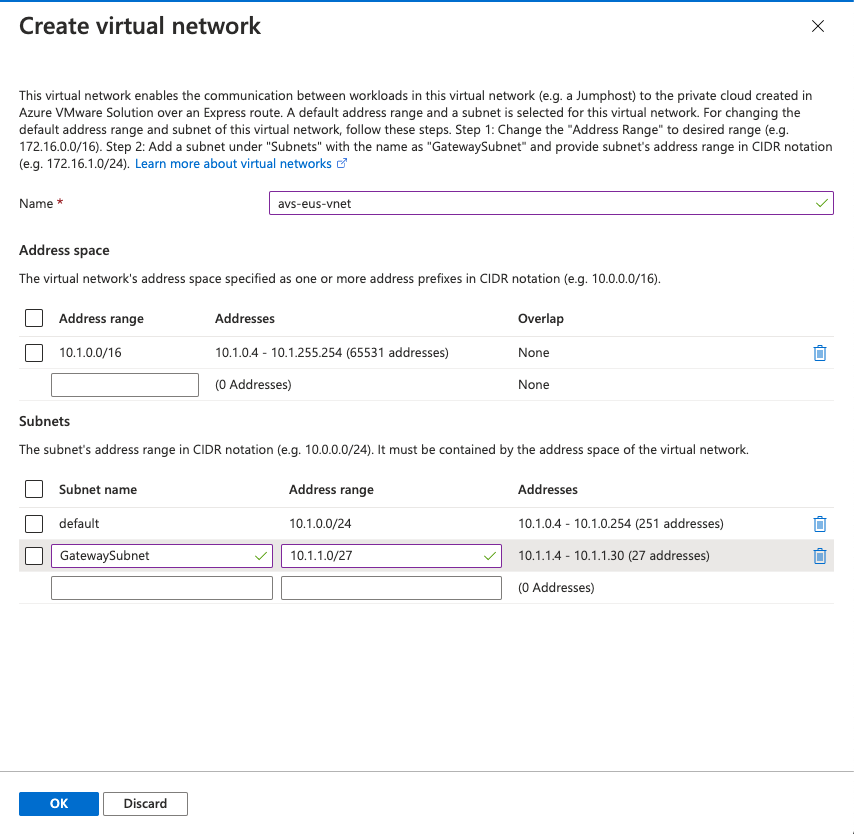
Virtual Network (optional for bare AVS deployment, will be used for Jumpbox later).
The provisioning process gives you the possibility to create or select an Azure VNET, in this VNET a new ExpressRoute Gateway will be deployed, and the corresponding authentication keys produced and configured to access AVS environment from any workloads running on that VNET.
For this Lab create a new VNET and make sure you create a GatewaySubnet subnet.
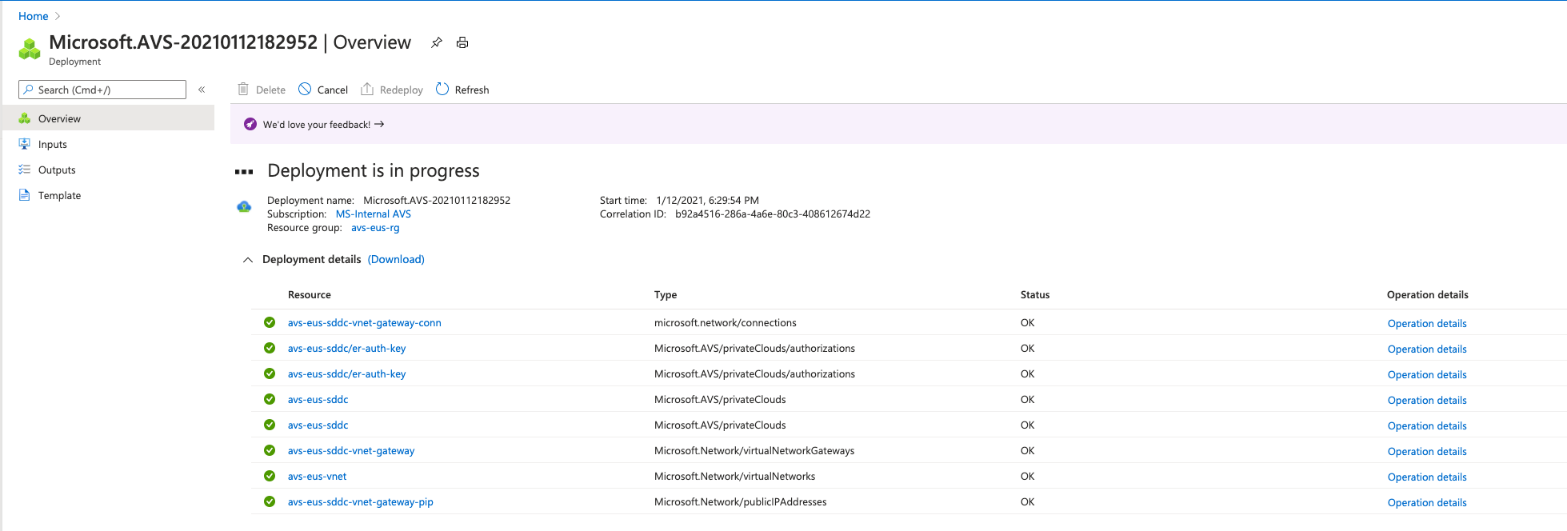
Finally go the Review + create screen, check that everything is validated and select Create. The operation will take at least two hours to complete. The status of the deployment can be monitored from Azure portal.
APPENDIX 2 – Configure AVS Networking from NSX-T Manager
An AVS Private Cloud comes with NSX-T pre-deployed, as we have seen in the previous sections, but no network segments are configured for the guest workloads. The workloads require DHCP services for IP address assignments and a network segment.
In this lab you will learn to:
-
Create a DHCP server.
-
Create a network segment.
Create a DHCP server
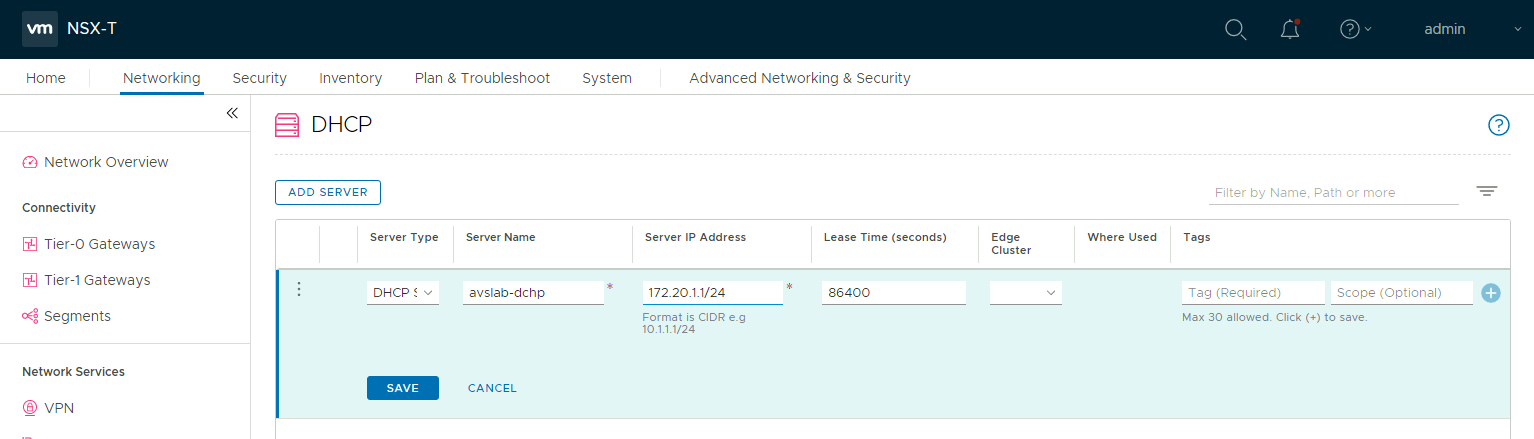
From the Jumpbox desktop open Edge and access NSX-T manager as you did in the previous lab. In NSX-T Manager UI select Networking > DHCP, and then select Add Server.
Select DHCP for the Server Type, provide the server’s name and IP address, and then click Save.
Next in Connectivity select Tier-1 Gateways. Click on the vertical ellipsis and select Edit, a configuration screen will open. Click on the No IP Allocation Set link.
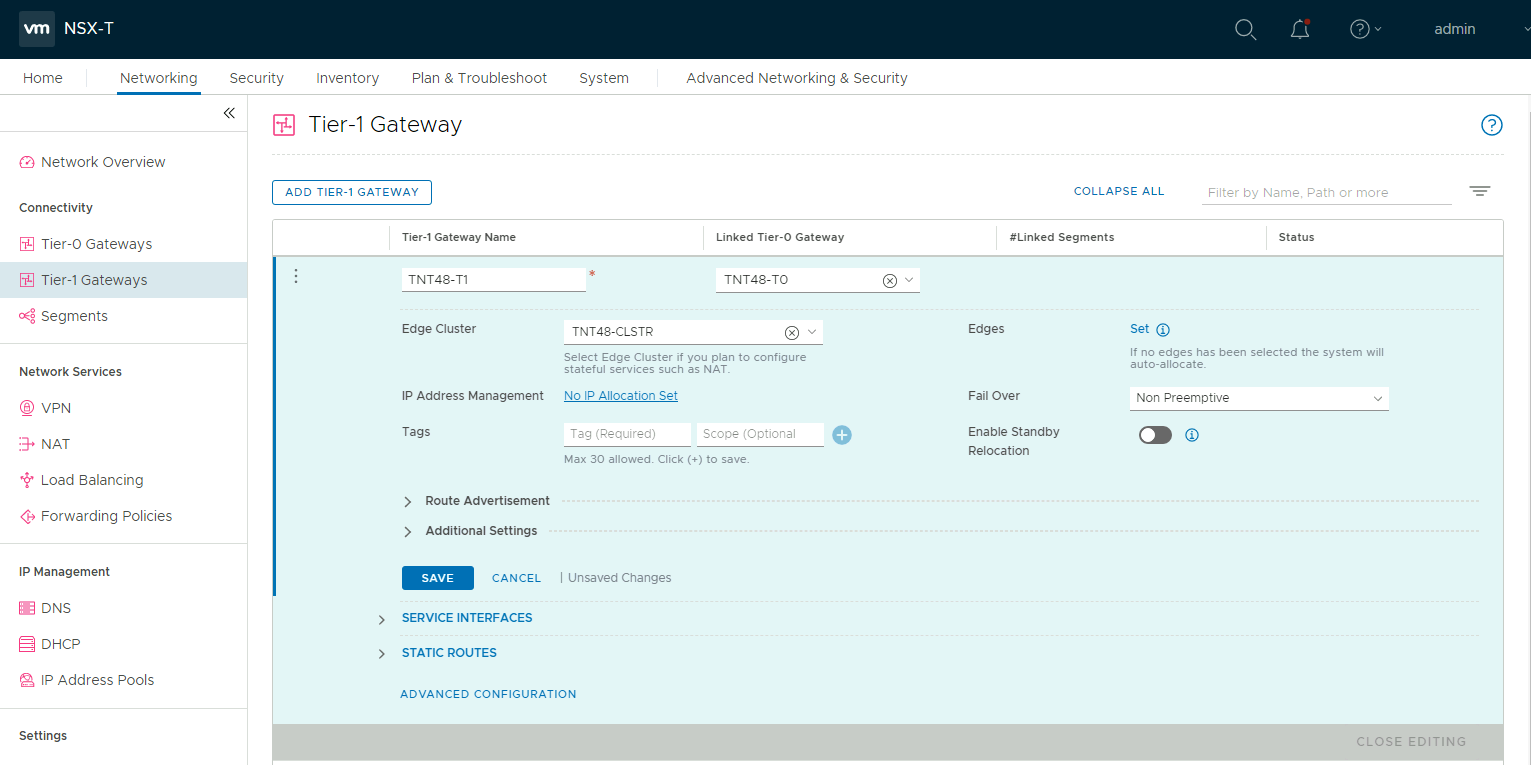
In the pop-up set the type to DHCP Local Server and select the DHCP server and click Save.
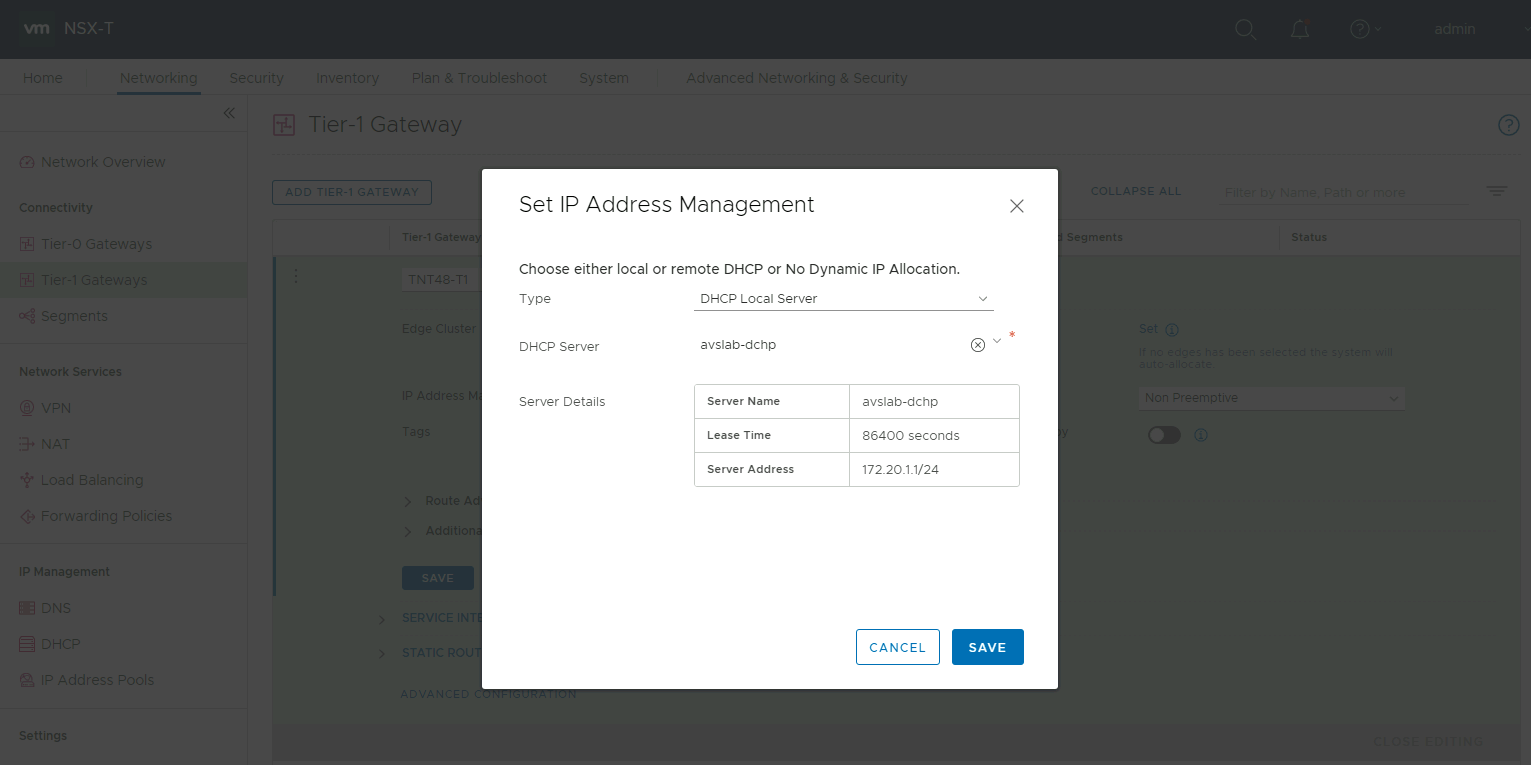
Click on Save again and on CLOSE EDITING.
Create network segment from NSX-T Manager
Go to Networking > Segments, and then select Add Segment. In the segment creation screen enter the name for the segment, select the Tier-1 Gateway as the Connected Gateway and leave the Type as Flexible. Select the Transport Zone of type Overlay.

Click on Set Subnets. Enter and IP address for the gateway, remember that the address needs to be on a non-overlapping RFC1918 address block. And enter an IP address DHCP range. Select ADD and then Apply.
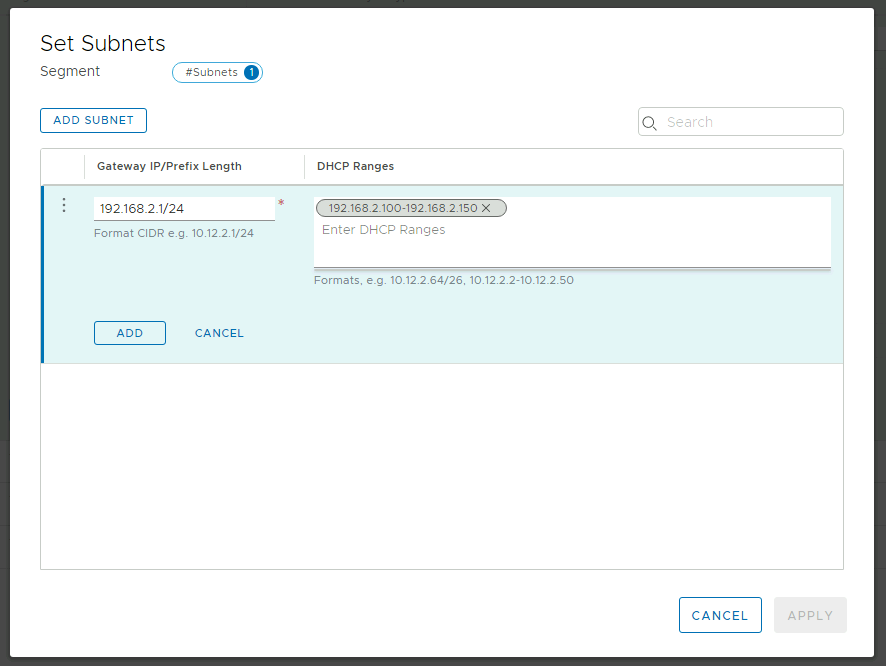
Finally click on Save and No to finish the creation of the segment.
APPENDIX 3 - Deploy VMware Photon OS OVA from URL
If your content library is not ready, you can kick off deploying Photon OS OVA directly from the URL as you can see in the steps below. After the wizards starts (after step 2), the steps are common between deploying from Content Library or deploying from URL directly, so you can refer to the VM deployment Lab.
-
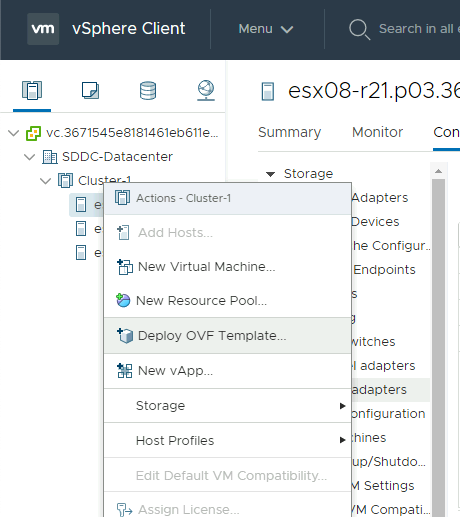
Go to Jumpbox, open vSphere Client (vCenter) and login into vCenter with clouadmin@vsphere.local credentials. From the Hosts & Clusters screen right click in Cluster-1 and select Deploy OVF Template.
-
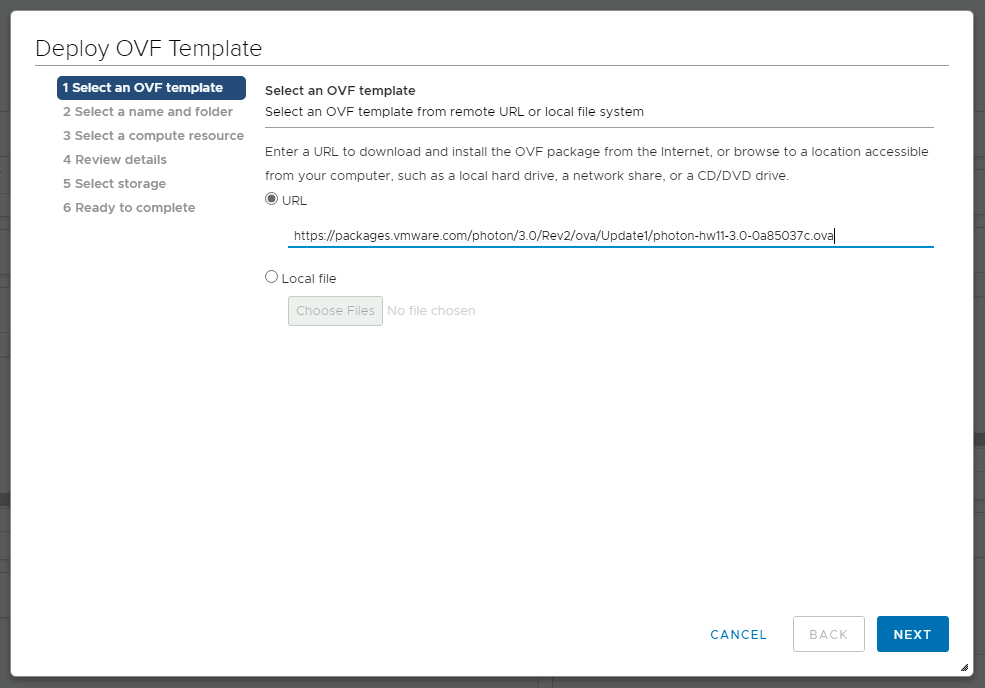
In the pop-up screen make sure to select URL and enter the following address and click Next. The link is: https://packages.vmware.com/photon/4.0/GA/ova/photon-hw13-uefi-4.0-1526e30ba0.ova (223 MB).
Accept the certificate, enter a name for the virtual machine and select a location. For the location leave the Virtual Datacenter.
APPENDIX 4 – Configure DNS Forwarding through Conditional Forwarders
There is another way that allows you to achieve the same result that you achieved in LAB3- Section 3. You can create a Conditional Forwarder instead of forwarding all DNS traffic to Azure DNS virtual server.
-
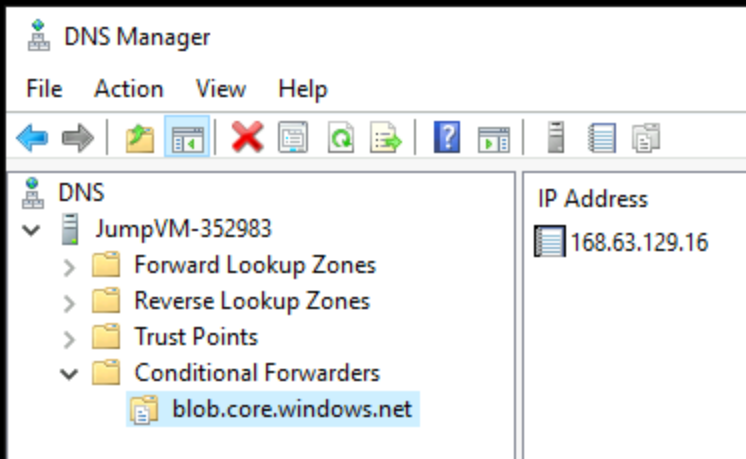
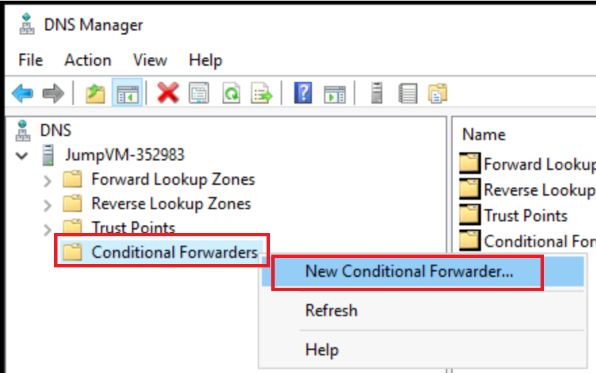
Right click on Conditional Forwarders and click on New Conditional Forwarder….
-
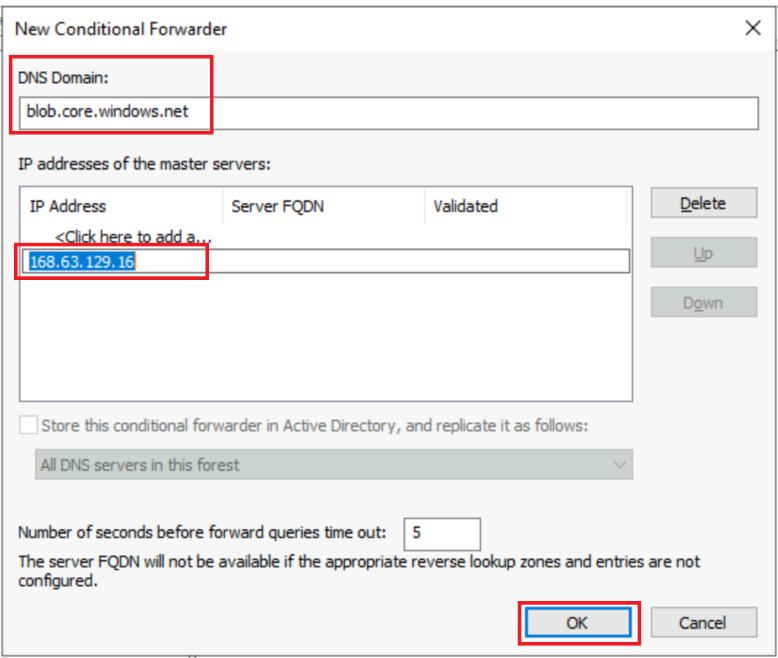
In the DNS Domain, get the value from this article Azure Private Endpoint DNS configuration | Microsoft Docs, specifically it’s the value in the Public DNS zone Forwarders. Of course, you’ll need to create a Conditional Forwarder to each service you are using. For example, for Storage Account Blob sub-system, you’ll choose: blob.core.windows.net. Under IP address of the master servers, you need put the IP of Azure DNS virtual server 168.63.129.16. Click OK to create the Conditional Forwarder for Storage Blob service in this example.
-
And that’s what you’ll get. Remember that you’ll need to do this for each service you are integrating with Azure Private Endpoint and creating an Azure Private DNS Zone for.